This all runs alongside the trailer fixing work but I thought we needed to keep them separate to avoid everything getting too confusing. Much of the boat restoration work also happened in parallel with working on
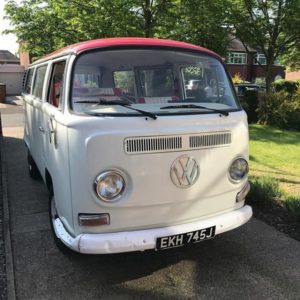
two of Matthew’s projects – Restoration of a VW camper van that was living inside the gates of our drive at the time and completion of a horsebox bar conversion which was living on his drive about a mile away. Later on we also acquired a house restoration project (on instagram as “Life at no four”).
Don’t be too surprised if progress on any particular one of these projects seems slower than you might expect.
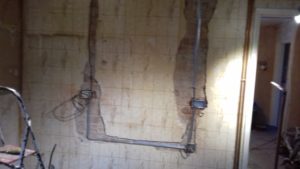
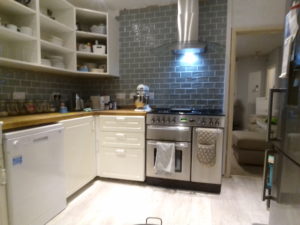
Day 3 of the Rathenice project meant the start of a serious tidy up both inside and outside the boat.
Bought some “exterior grade” ply to get started on making locker lids and hatch boards. Not really good enough for long term use but with plenty of coats of varnish will be good enough to weather proof the lockers and cabin and should last until I can get something better.
Got various bits out of the lockers and threw out the identifiable junk, including the rotten and de-laminated tops of the cockpit storage lockers and a fuel tank with most of the bottom rusted through. The state of these bits suggests Rathenice has rested unused in the yard for longer than I had anticipated. Found the companionway drop boards so can start to make the cabin more waterproof. Took off the mast so that can be sorted out in the back garden.
Eventually got a reasonable start made on locker lids and, while waiting for the glue to dry, started to clean up the decks with the pressure washer to remove lichen, moss and general grime. Had to improvise a 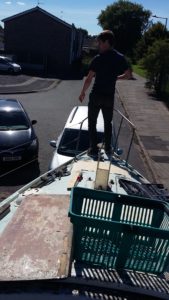 bit as the chain pipe into the locker is currently in a bag in the cabin and the slope of the drive meant all the water was running forward and down the hole. Some of the water flowed over the side once a piece of plastic waste pipe was in place but I suspect I will be testing the bilge pump tomorrow to get rid of the rest.
Day 4 (Sunday)
More locker sorting and completed the 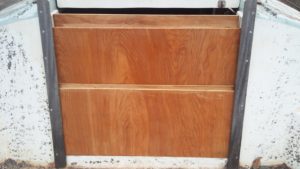 building of the cabin door boards. Discovered the front lockers under the V berths were completely full of water from the pressure washing yesterday. Bilge pump doesn’t reach there or doesn’t work so fished out all the floating things to let them dry out a bit.
Day 5 (Bank holiday)
Off to a good start with varnishing the bits which I was making. One coat on each side and did the sail battens too. It’s a bit fiddly to arrange but have been using the sash clamps to hold white oak edging 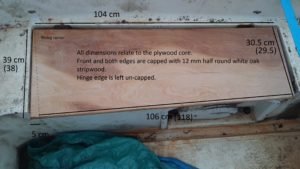 strips onto the first locker lid. Glued the long cockpit edge strip overnight and the two ends during the day. Ready for sanding and varnish tomorrow. The notes on the image here are to remind me of the true dimensions needed when I have proper marine plywood and re-make the locker lids.
Started in the boat by bailing out the V lockers into the sink. Closer inspection shows that I will need to arrange for bilge pumping capability in at least three sections of the hull. The current manual pump has the suction hose around the engine area but there is a partial bulkhead between there and the galley / dining area and the forward lockers are waterproof up to their top level. While doing the bailing I discovered the location of the echo sounder transducer inside a fiberglass box at the junction of the two V berth fronts. This was originally a cardboard box fiberglassed into place but there is or has been so much water around that a lot of the cardboard is floating in the locker leaving the resin and mat behind. The edges are like a saw blade so great care is needed around that.
Main achievement for today was to fit a plywood wedge under the foredeck and re-fit the hawse pipe for the anchor chain into the locker. The deck had signs of cracks around the mounting holes when I 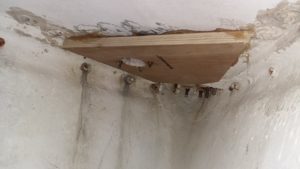 cleaned up the surface so obviously needed some reinforcing. This is “glued” to the original fibreglass using chopped strand filler which I heaped on the board and then clamped it in place to cure. There is obviously a bit of a gap but the edges and area around the hole are well covered. Can always add some more into the gap later and then paint the inside. I will have more fiberglass work to do in that area anyway as the front bulkhead is detached from it’s fixing. The metal fitting is now bolted in place on a bed of silicone sealant so hopefully any more jet washing water or rain will overflow off the bow rather than filling the locker.
Got started on preparing to re-fit the mast tabernacle and the Samson post. Both had been removed by drilling off the heads of machine screws because the nuts under the deck have been fiber-glassed over. Seems to have been given a complete coat of mat and resin inside the whole cabin roof. Not sure if that was to stop leaks or just generally strengthen the decks. Almost everything had been covered including all the interior wiring, only the radio antenna lead seems to have escaped. Hopefully all the wiring will work OK so I wont have to bypass anything. Need to check the navigation light requirements though as there is currently a single white light on the mast visible to the front and sides but not all round. I think that is OK as a “motoring” light but possibly also need an all-round “anchor” light. Easy enough to re-wire the mast for extra lights if needed but will need extra wires back to the switch panel and a waterproof connector with more pins.
Doing the prep work showed there has been quite a bit of corrosion to the bottom of the aluminium mooring bollard so I think all these parts need to be included in the galvanic bonding system. Currently that is rather basic as there are two through hull studs just aft of the propeller and two wires connected inside. One probably connected to the engine originally as there is a ring terminal not connected to anything. The shorter one may have been connected to the stern gland as it is too short to reach much else. None of the skin fittings seem to be included in the protection wiring so quite a bit of cable to add in for them. Unless removed during a re-paint this may have never been working very well as the exterior threads are covered in anti-fouling paint with no signs any anodes were ever present or nuts to attach them. The galvanic grounding system will need to include all of the skin fittings and actually fit some zinc.
Rathenice has a Vire petrol engine built in Finland. From reading the online information that I can find, there are Zinc plugs included in the cooling system so that at least should have been protected.
I am also a bit concerned that the mast is not grounded. I recall reading something in Yachting Monthly some three decades ago about the need to include all the shroud mounting plates too as you can get sideways discharges in the cabin if the mast is hit by lightning. Waving around a nice tall conductive mast in a storm does seem likely to give you a good chance of attracting a hit so now is a good time to install protection. I will at least connect together the bow roller plate, cleat and mast step because an anchor chain or mooring seems to me to be the likely place for any strike to leave the boat.
Did a bit of exploring behind the engine and under the cockpit floor. Revealed a few new jobs to get done but nothing that struck me at the time as being major.
Did some token gesture sanding on the hand grabs on the cabin roof. Not sure whether the wood was originally as dark as it now is but it doesn’t change colour as you sand it so I guess what we have is what will be there to begin with.
Slight end of day woops as the top access board wont fit. To have a strong top to the board I glued a piece of thicker ply across the top to take the padlock etc. Yesterday I had carefully marked off where this strip could go to and still clear the entrance. I then cut and glued a full width piece but didn’t realise that was wrong until after the varnished second side was dry enough to try to use it.
Day 6
Sorted out the problem with the hatch board reinforcement and varnished the newly cut wood. Also put varnish on the cabin roof hand rails which were sanded yesterday. They certainly soak up a lot of varnish with the surface of the first one looking almost dry by the time all four had been varnished.
Sanded and varnished the first side of the starboard locker top. Will make a start on making the second one tomorrow once I have the plywood and fitting bolts.
Day 7
Second side of the locker lid has it’s first coat of varnish. Otherwise mainly an online shopping day for the trailer steel.
Picked up a second sheet of plywood for the port side locker lid and A2 stainless steel bolts to attach the hinges to the fiberglass deck. Marked out ready to cut but by that stage it was too dark to do that accurately.
one major step closer to the interior being water proof and secure as I am now using the new hatch boards although the locking hasp is not yet attached.
Day 10 (Saturday)
Started by cutting out the plywood for the second locker lid and gluing on the half round oak strip on the longer side. Fairly heavy rain later so ended up needing to be covered with a tarp while the glue sets. Decided to get on with the trailer and leave varnishing the second side of the other lid until this one is ready for it’s first coat.
The persistent rain does mean I am now confident that the chain pipe is waterproof as the foredeck is a nice deep puddle overflowing across the stem head fitting rather than leaking into the hull.
Day 13
Connectors for the mast cable also arrived so I am ready to make a start on the mast base.
Day 17 (Sunday)
Investigated the state of the propeller, rear bearing and it’s stainless steel mounting piece. There are a couple of potential problems but nothing I am not confident I can sort out. Might not end up as the neatest solution to mounting a stern bearing but we will see what can be achieved. What seems to have happened with this is that someone 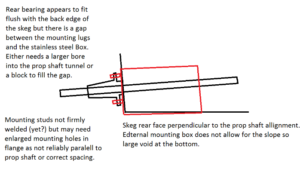 either broke off the mountings studs for the cutless bearing or else they broke off. There is a large bearing casting which seems much larger than the original because the damaged holes dont line up however there is a welded up stainless steel sleeve which will fit the hull and has two reasonably well aligned mounting studs. At the moment my main concerns are to work out the best way of attaching the stainless steel component while being able to ground it to the galvanic protection (and probably the lightening conduction wires as well. This and the propeller seems like a useful piece of metal to use as the exit to ground potential). All the propeller thrust will be taken by the engine mounts so the attachment doesn’t need to be particularly strong. Maybe can clean off paint down to the fiberglass and epoxy the metal onto that.
Once the trailer is sorted out I think the next priority needs to be to take the engine out of the boat so it can be checked over on the garage bench. I don’t know how long it is since it has run so there could be a damaged fuel pump diaphragm and the water pump impeller also needs checking. I also don’t trust the old petrol pipes to be secure so will check or replace those and also the cooling water pipes.
I have evidence of spare parts being fitted in 1996 as there are receipts in the handbook but nothing recorded since then. Another variation from the eBay details though as the spares list is parts for a Vire 12 rather than the Vire 7 engine listed online. Makes sense for it to be the bigger version though as it has the electric choke unit which is described in the handbook as being fitted to the 12 Hp version.
Saturday 17/9/16
Alongside the trailer work I had glued on the two edge caps on the second locker lid and also attached the handles and hasp onto the top companionway board. Varnished all of those before starting work on the camper van.
Sunday
Mainly trying to concentrate on making progress with the interior of the camper van today.
First coat of varnish on side two of second locker lid and removed rusted hinges and engine controls from boat. Need to do a bit of cleaning around the locker lid mounting points and then can fix the new lids.
Tuesday
Cleaning up around the cockpit locker lids and started on clearing out the old mast mounting bolts. Plan is to try to get the deck and cabin roof clean enough to put on some paint fairly soon. Practical boat owner suggests using Sandtex masonary paint on decks as an economical way to get a non-slip finish (http://www.pbo.co.uk/event/beaulieu-boatjumble/deck-paints-test-17514). You get a choice of colours and the only downside to the paint was that the white version was difficult to get clean. So maybe the grey textured paint for non-slip areas (5L for £29 at B&Q.) and brilliant white non-textured for the less walked on areas (£17.91 for 2.5L or £28 for 5L at B&Q). Alternatively solvent type brilliant white gloss paint with 10 year warranty (£17.64 for 750ml). End result will look something like this (Again drawings modified from documents on the SMA website)-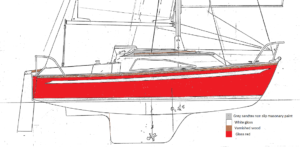
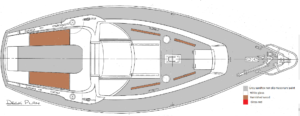
Saturday 24/9/16
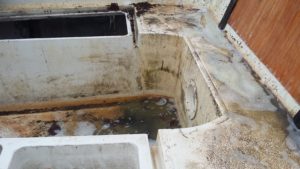
These are the “before” photos.
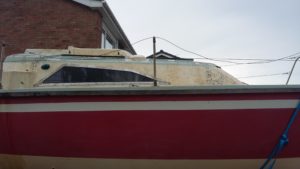
5hours of scrubbing with washing up sponges and Jet washing. Wore away the pan scrubber side from 5 scourers but they made a substantial difference to the look of the deck and cabin. Previously did one clean of this area but here is the effect of washing up liquid plus pan scrubbing on the port side of the cabin roof.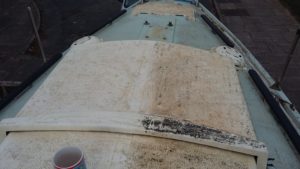
Following that with the jet washer too means there is no sign of the black / green growth any more. Didn’t make much difference to the rust marks though and revealed that some of the mess is actually dark red paint and varnish.
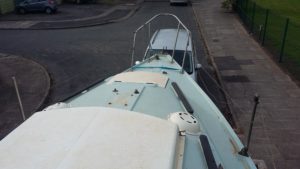
Starting to look more like a presentable boat which is cared for rather than a rockery stone covered 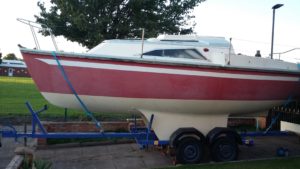
in lichen and moss.
Even managed to get enough slope on the boat to get the cockpit draining and therefore could clean that out with the jet washer as well.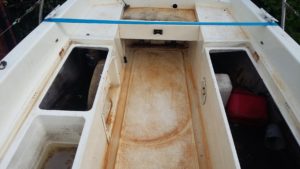
There is not much sign of clear gelcoat left on the fiberglass so I have come to the conclusion that painting is the best option, particularly as there are several small areas of cracking and damage where the underlying mat is exposed. These will need to be filled but don’t think it would be viable to try to colour match new gelcoat with the old. There is also a lot of staining in some areas due to the rust and this might need quite heavy sanding to get to un-stained layers so paint seems a more logical idea. Can always make a wooden grid for the cockpit floor if the paint rubs off too easily.
Test fitted the starboard locker lid. At the moment it wont close 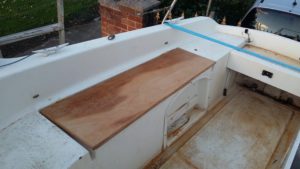 properly with the pan head 4mm bolts and it has a wooden block below it’s front edge. The bolts will have to be swapped for countersunk version in stainless steel, bronze or brass. Need to finish the varnishing on the port lid and then can fit it temporarily to reduce the amount of rain that gets in.
Started to dig the remains of the tabernacle fixing bolts out of the fiberglass cabin lining. Hopefully my replacement A4 stainless bolts will stand the test of time and salt water better than these but they are over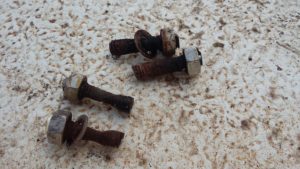 40 years old. Once all four are removed the area of deck can be
 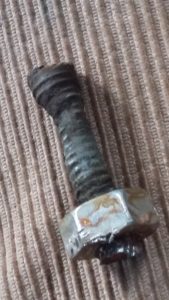 painted and the fitting replaced on a bed of sealant.
Removed the poorly installed seized fore-hatch closure latches. The whole thing will need a good tidy up as the mounting blocks are glassed on but not with adequate amounts of resin in the mat which was then not tidied up before mounting a mixture of aluminium and steel components which were all very corroded and dysfunctional. The hatch is one of the 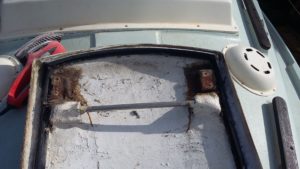 interior pieces which have been painted with emulsion paint that has now turned to dust and started to
 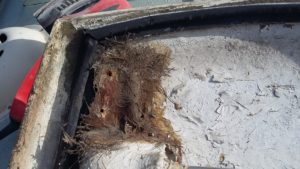 peel off. Will be greatly improved with a bit of resin, filler and a new coat of a paint that will attach properly to the resin.
Month 2 : Starting to restore the boat instead of the trailer.
Sunday 25/9/16 (1 month General impression of the boat is much better with cleaned up topsides and I have rigged up a tarp cover over the cockpit to try to let the cockpit and lockers dry up a bit even if we continue to get showers.
Ordered the bolts I will need for the mooring cleat, mast tabernacle, rudder pintles, tiller mounting and some M4 countersunk bolts for the locker cover hinges and other low load fixing jobs. As this marks the day when the trailer repairs were completed the rest of the posts will be about the boat!