Monday 25th May Yet another bank holiday when nobody is supposed to be going anywhere significant. Progress with boat projects seems to have slowed almost to a halt due to suppliers not delivering. The holdup with the fiberglass delivery is that the catalyst was not actually in stock. Doesn’t really matter though as I need the plywood before the fiberglass will be any use.
Monday 1st June Rather a busy evening because the paint and plywood arrived today so, as well as the evening authorising, I have a large box to unpack and somehow get the paint tins and paint trays into the garage along with two thin sheets of plywood and a 12mm thick sheet.
The thicker sheet is too heavy to manoeuvre in the compact space available so I had to work out where the various bits will be cut from it and saw off around a third of the sheet. When it is all cut up the sheet will become two transoms for the tender, two cockpit locker lids, the two companionway barge boards and the water tank locker lid. There will also be a fair amount of randomly shaped offcuts because I didn’t want to be cutting anywhere close to the final edges of each piece.
Saturday 6th June Another wet day which is unfortunate as the hatch cover is still off the boat while I wait for 6mm plywood and fiberglass supplies to create the solar panel mounting. Means the rain leaks in via the holes for the mounting bolts but not enough seems to be getting in to cause problems with water in the bilges.
After tea I took the dogs for their walk and then used the new mini circular saw (bought to do worktops at the house renovation projects. Honest!) to cut out the replacement washboards and one of the locker lids. Works quite well as a track saw, you just need to clamp down a straight edge 21 mm from where the cut is supposed to go and then slide the edge along the barrier as you cut. Nowhere near as noisy as the chop saw or a normal circular saw and the blade is much thinner. However I still thought it best to pack in at 9pm so the other locker lids (including the water tank locker top) and tender transom blanks will have to wait until tomorrow.
Friday 19th June Fiberglass kit arrived today so the next challenge for tomorrow is to get the 6mm marine ply ordered if I can. That could be dependent on getting the van running again as the sheets are too big to transport on the car roof-rack.
Sunday 21st June Woken at 6:30 by the dog so I was outside fairly early. Main boat achievement for the morning was to fiberglass the 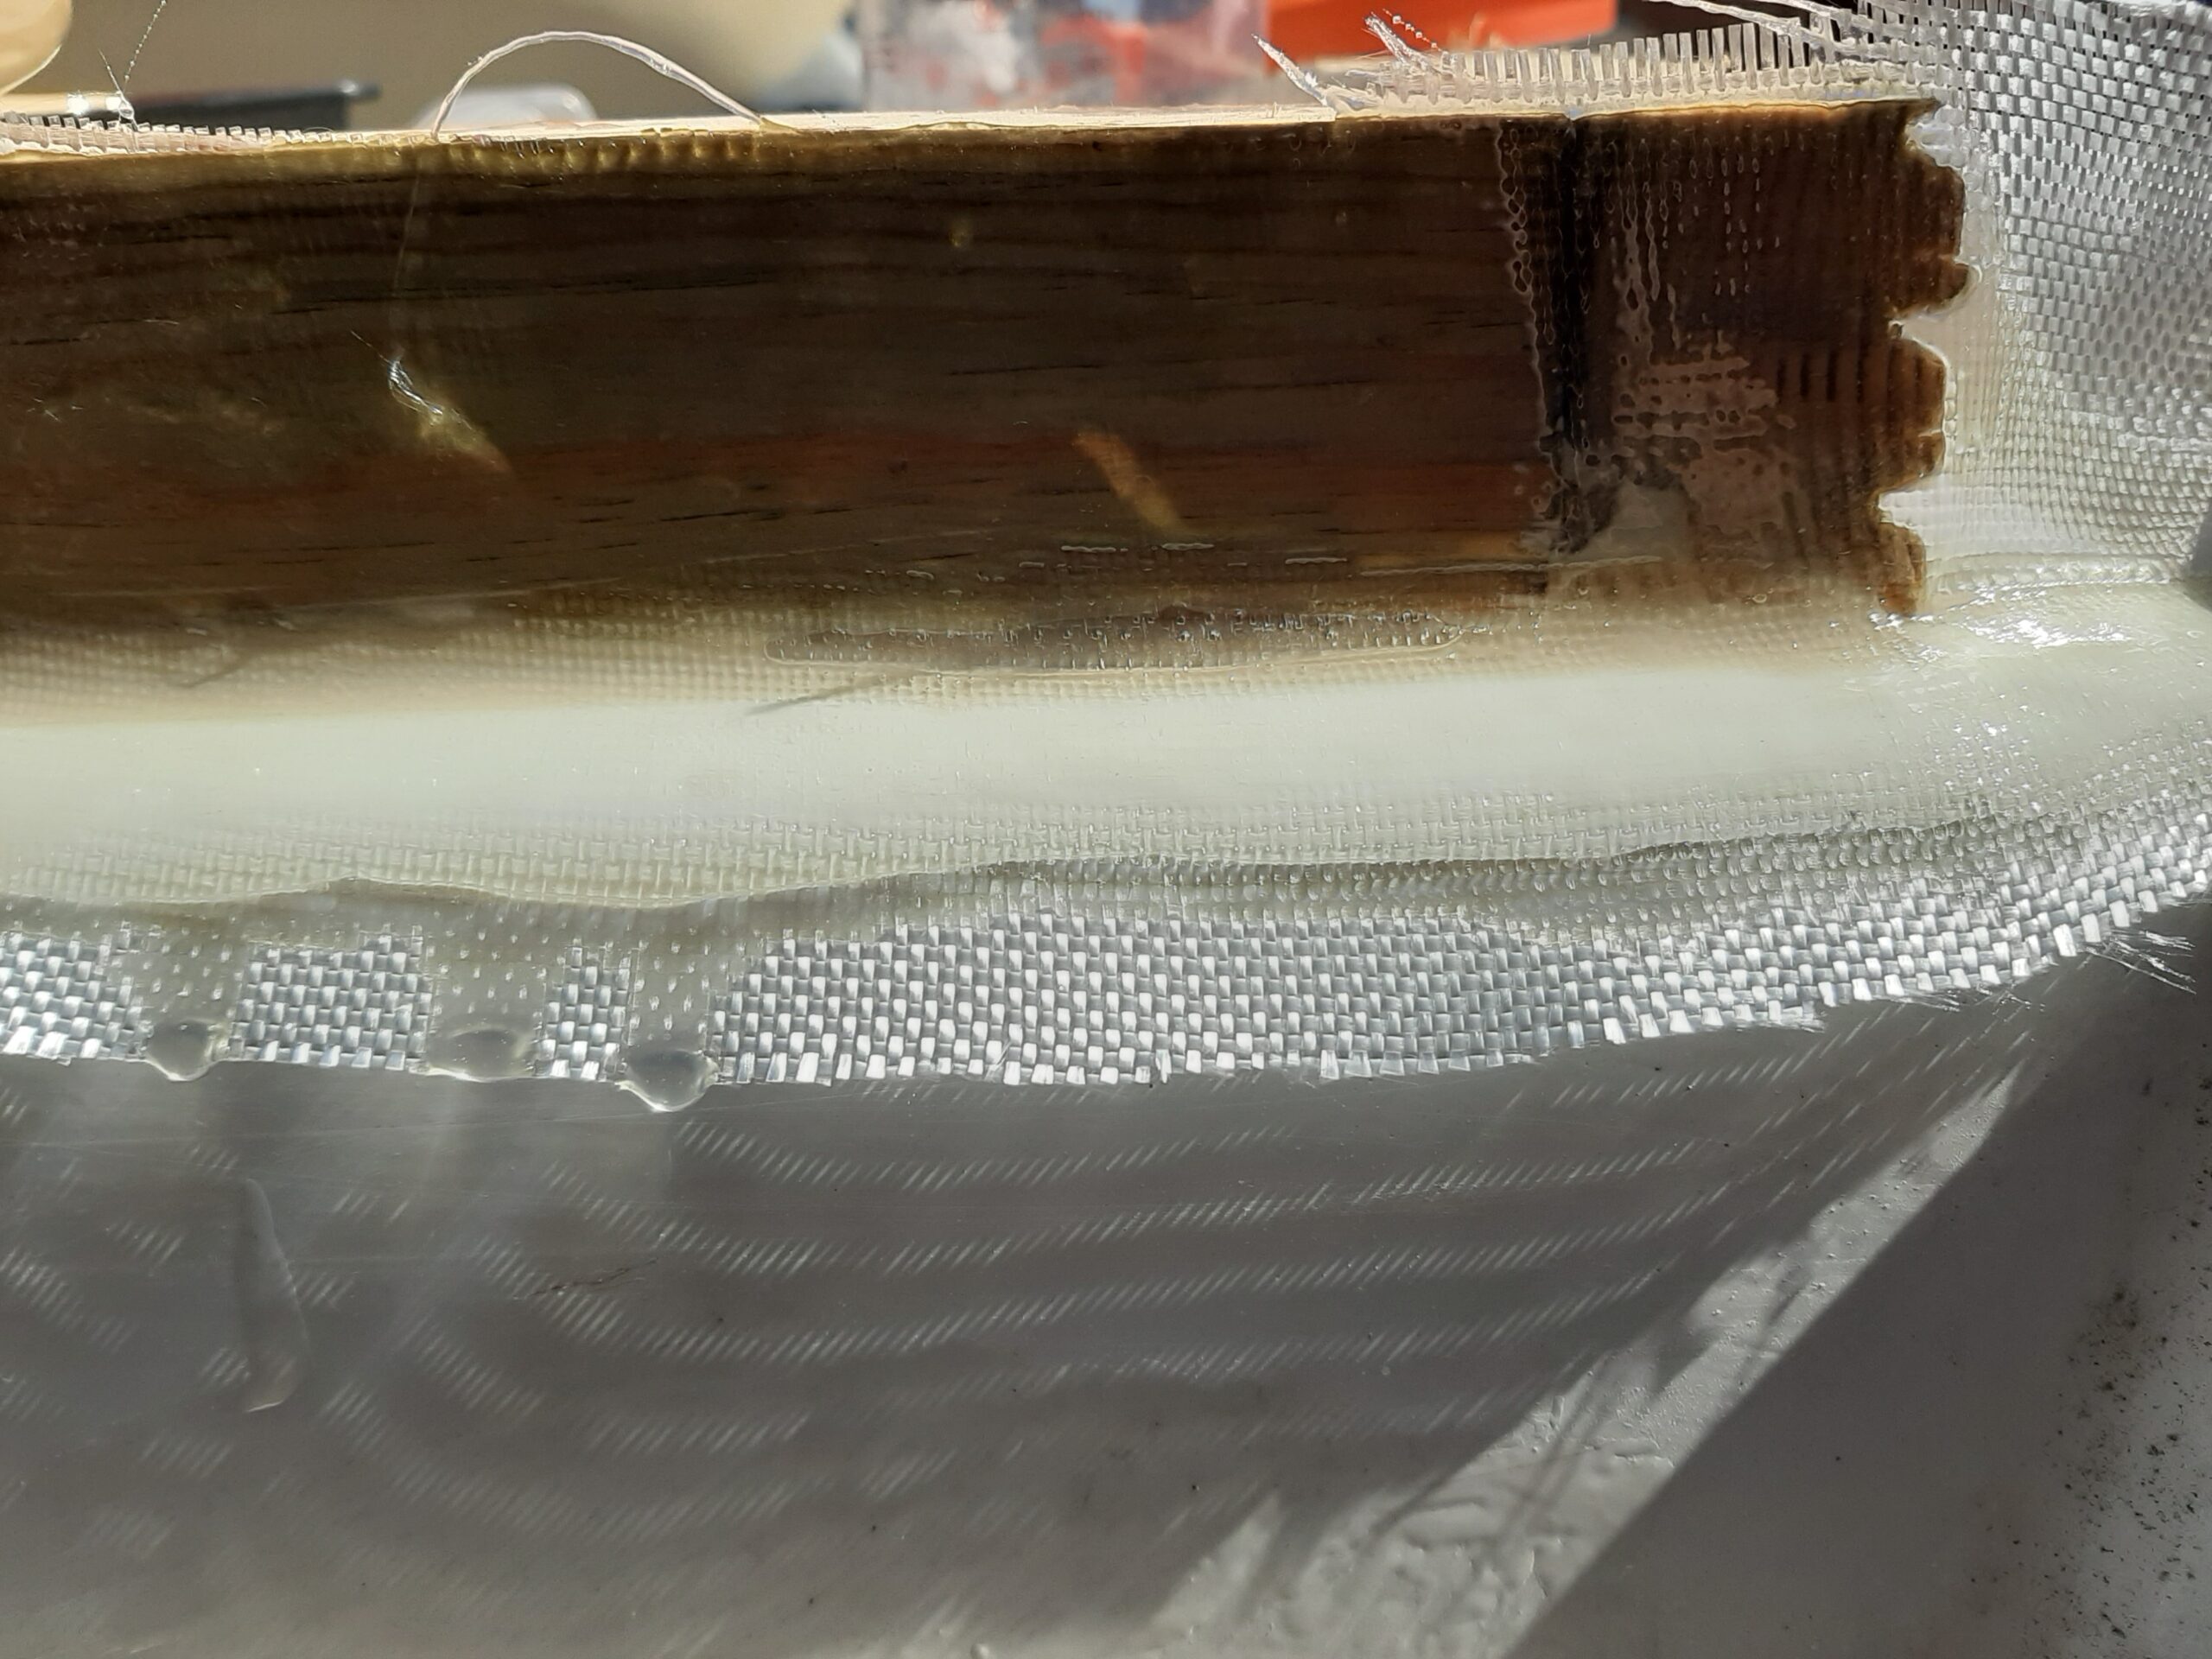
solar panel mounting frame onto the hatch cover. So far it is done with a single layer of woven cloth which used about 150 ml of resin and took 20 minutes to polymerise to the gel stage. Having got that far I left it to cure until the evening. Next step will be to add the two layers of 6mm plywood (although I am seriously considering using 3 layers of the thinner plywood if there will be enough left over after making the ceiling linings).
Wednesday 24th June Woken at my normal work day time so I was on the drive working on the boat by 7:30. Started the morning by cutting up the 3 mm plywood. Now have the two ceiling pieces and  also three layers of plywood ready to make into the laminated solar panel support. The idea is to laminate together three layers with the grain arranged at 90 degrees on each successive layer much the same way the individual layers are done in the original plywood. Slight mistake in that I installed the first piece onto the frame when I cut it from the first sheet. Subsequently discovered that I couldn’t get a second piece with grain the same way round so layer 3 will have to be in two parts with a join at the mid-point, that would have been better as the first layer but too late now as the glue is drying and there are holes for the screws that are holding the plywood in place.
By early evening the glue was nicely hardened so I planed off the excess plywood from the first layer. Expanding foam filler will go in tonight to fill the space between the plywood and the fiberglass hatch cover. That will cure over-night and I will remove any excess and the stainless steel screws tomorrow evening before adding another layer of plywood.
Thursday 25th June Only bit of boat work was to inject the aerosol foam into the space between the plywood and the hatch cover. 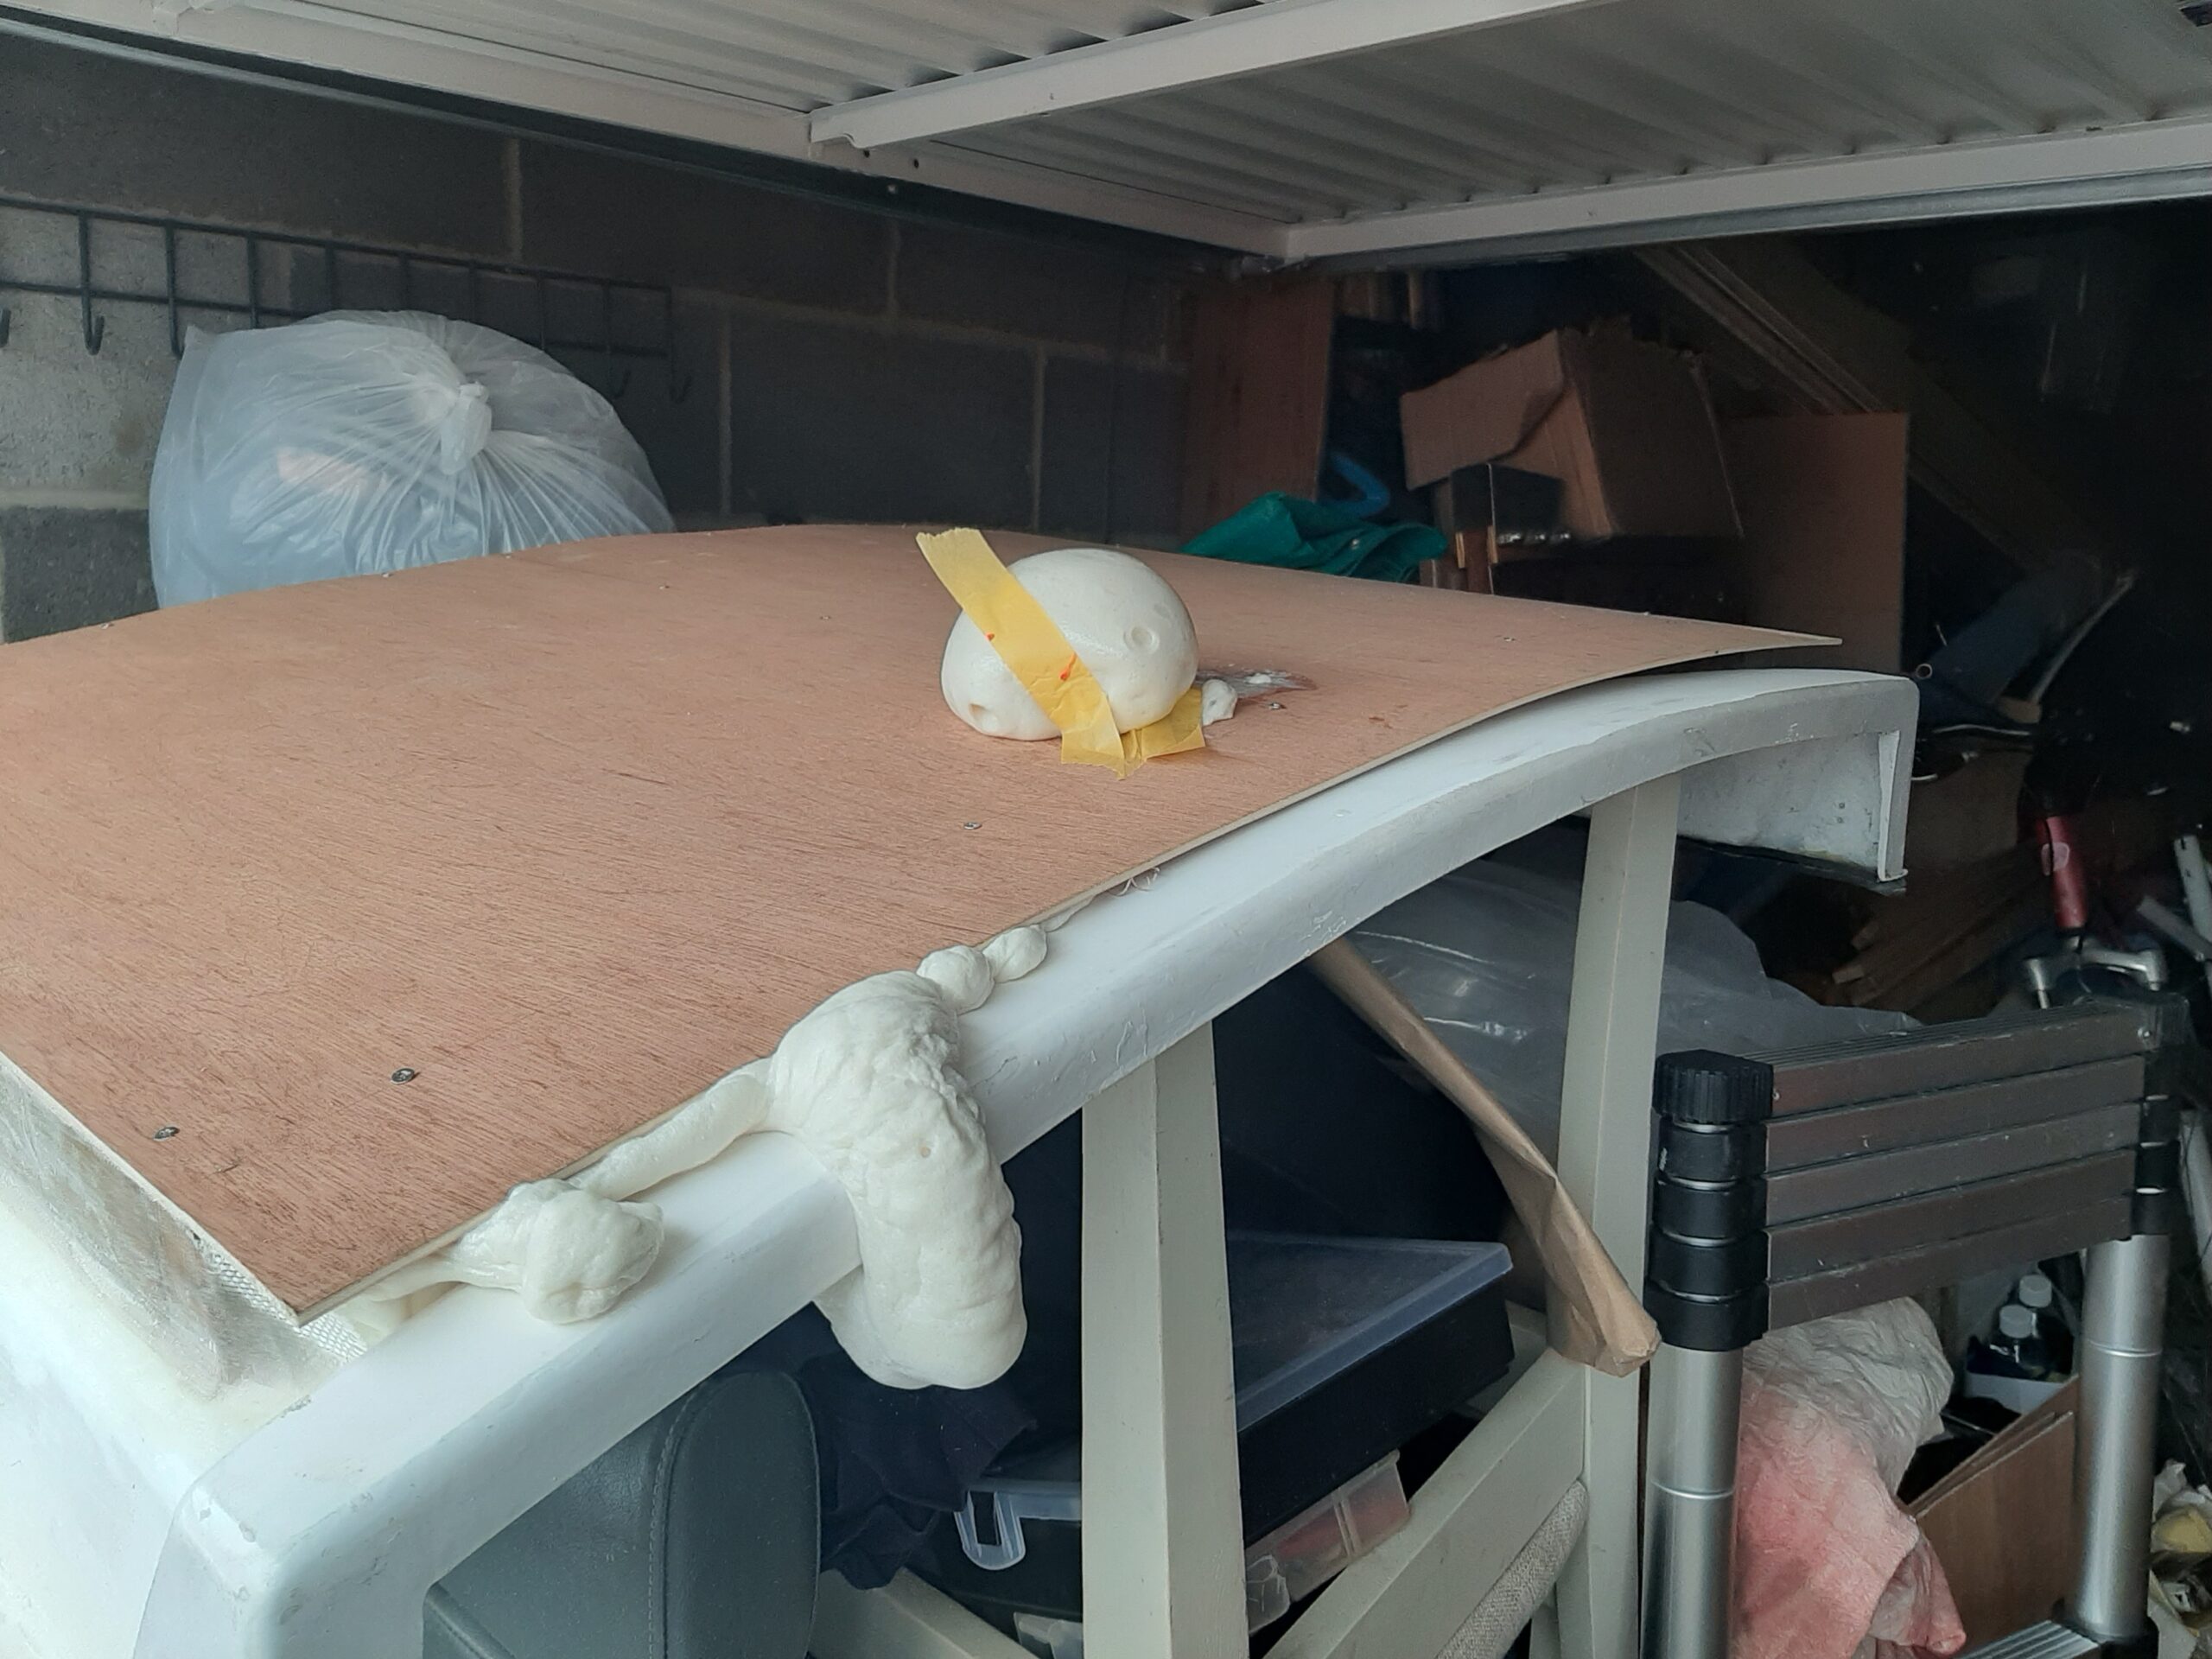 Expanded and overflowed nicely on one side and just about came up to the access hole on the other.
Saturday 26th June Awake and making progress before the alarm went off. First job was to clean up the surplice foam from the solar panel mounting and then add the second layer. All progressing well until it started to rain heavily just as I was mixing the second batch of resin to do the laminating.  Ended up assembling it in the wet and in a rather hurried manner before putting a polythene sheet over it while I organised the garage. Not a perfect alignment along the companionway edge but you wont tell once the third layer and the final fiberglass covering are added.
Sunday 27th Started well with me in the garage by 7:30 but as I took out the screws from the second layer it became obvious that there was not enough resin between the two layers and it had only glued on part way across. 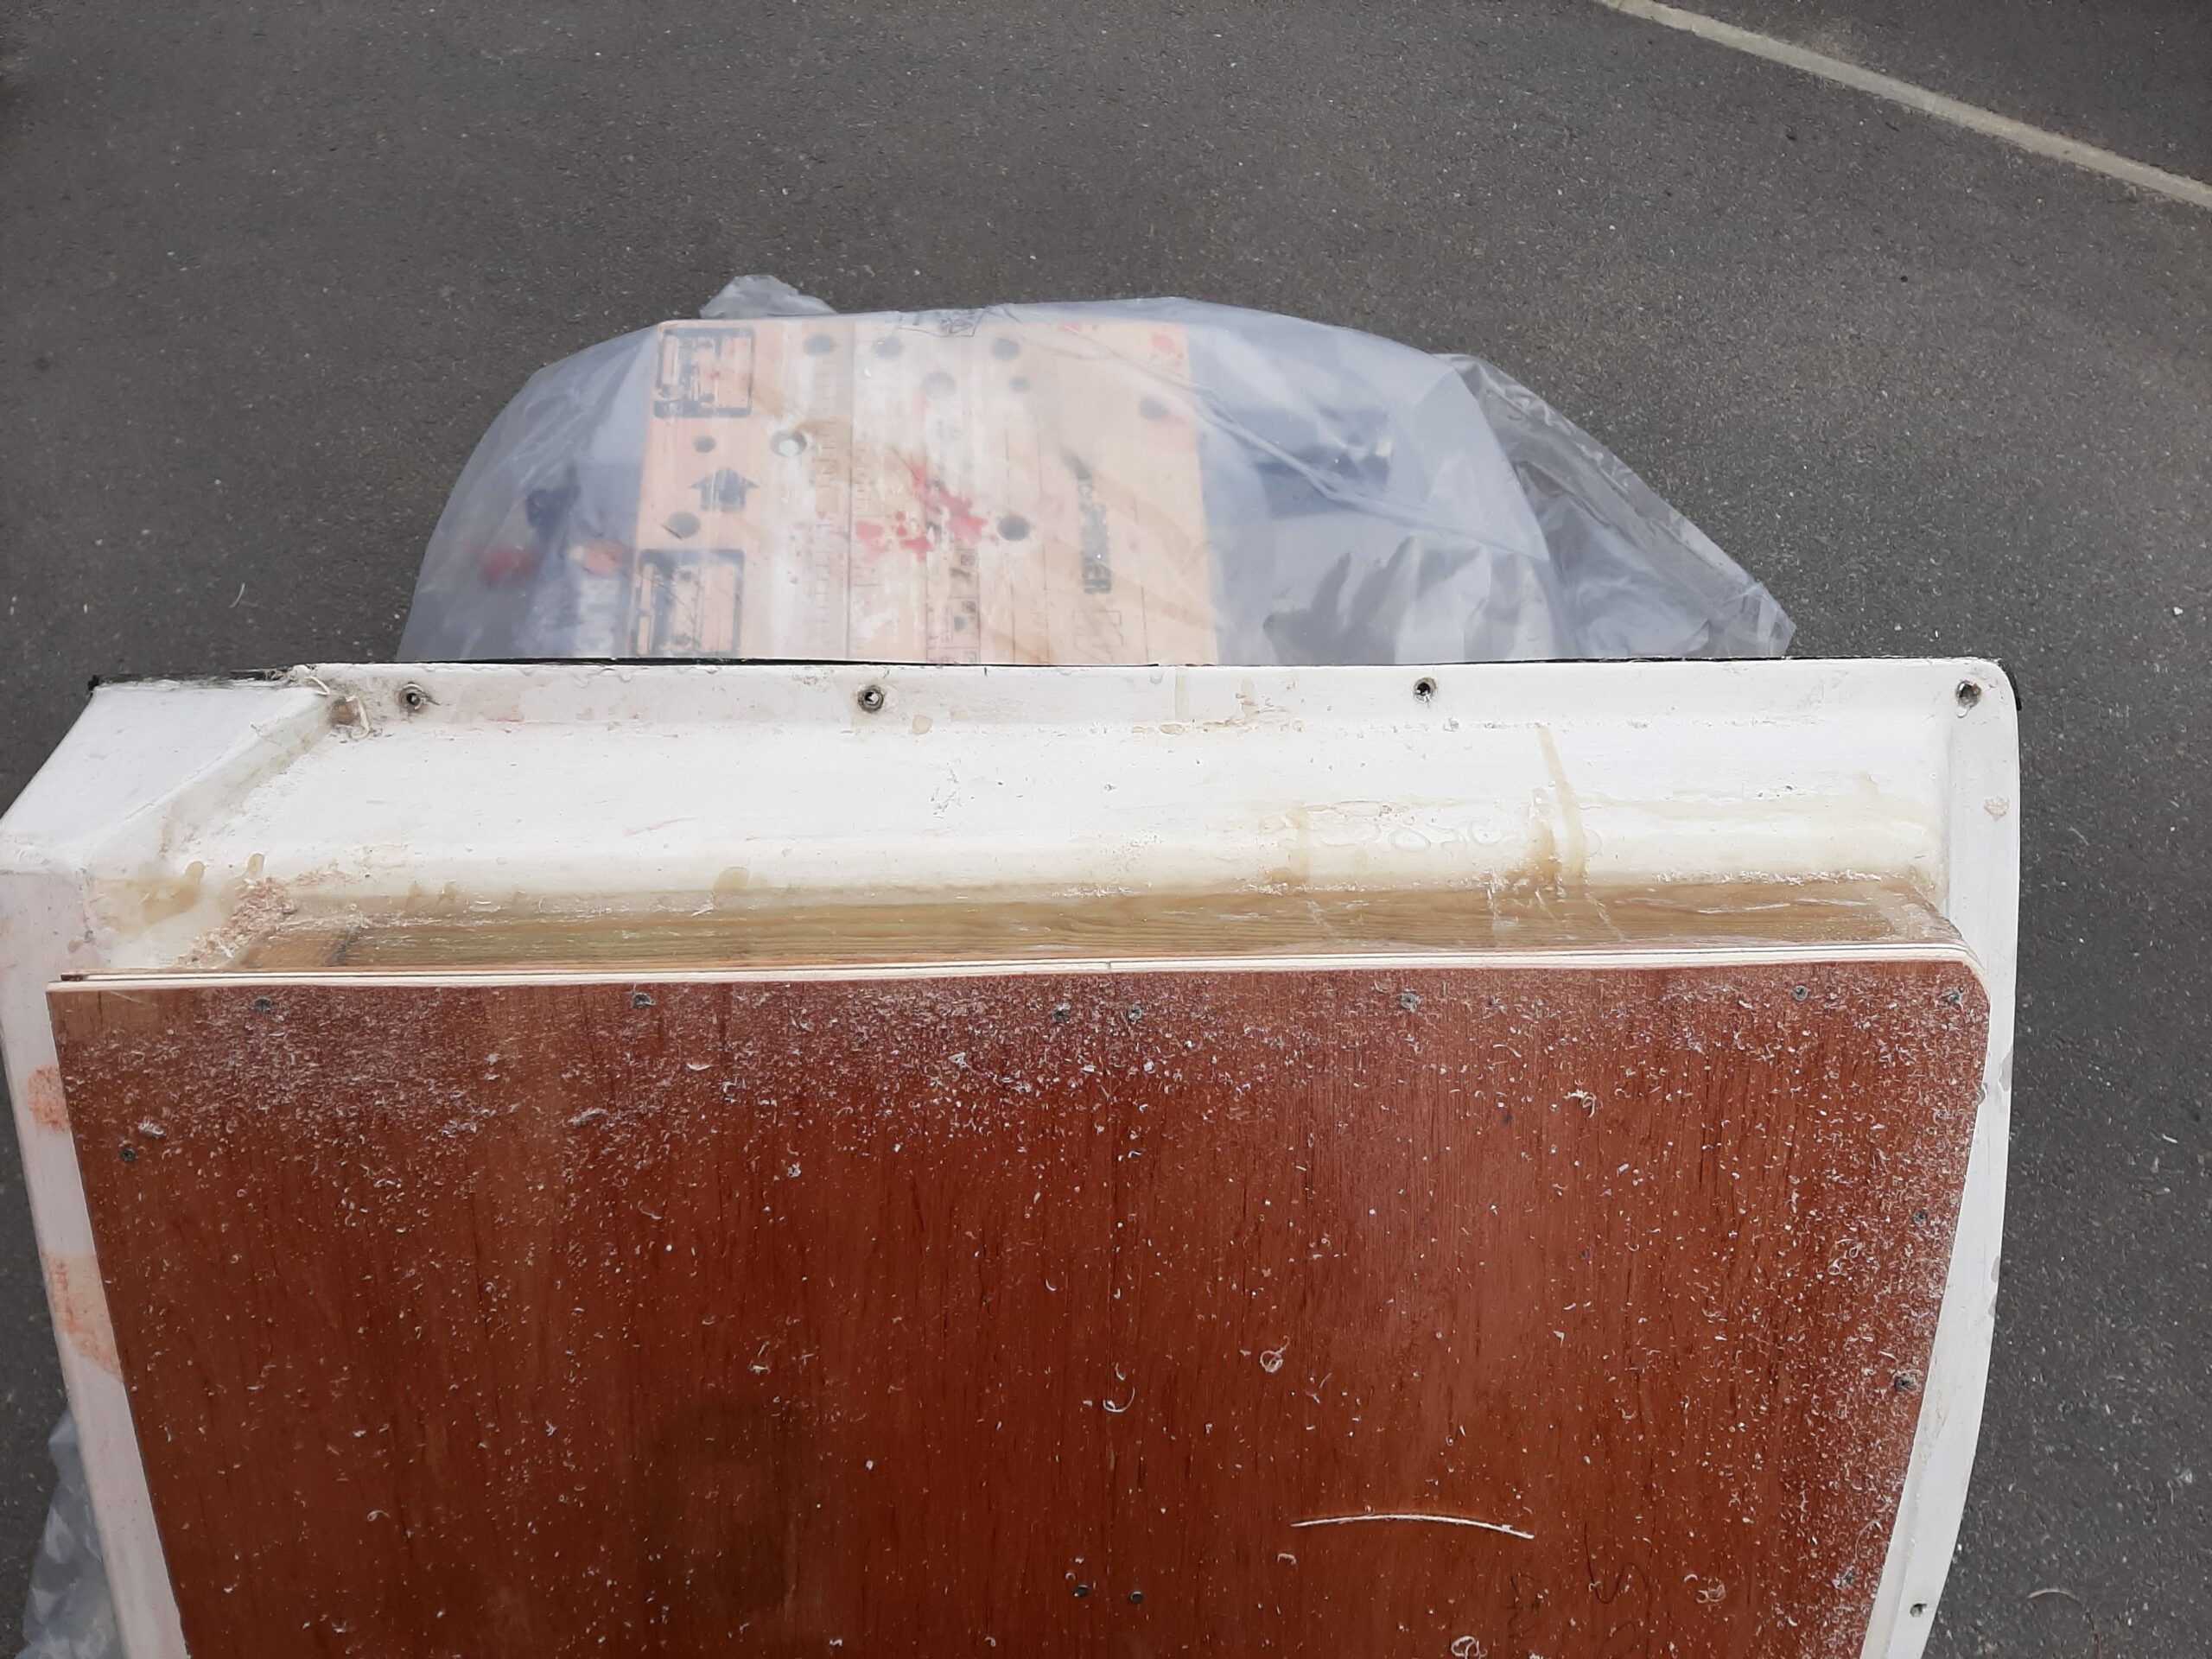 Mixed up another 100 ml of resin and poured it into the gap with the assembly arranged diagonally against the workmate so I could close it with the screws and monitor progress. This time there should be a decent gap filling layer and hopefully the two layers will be stuck together across the full width.
Just finished that when Matt arrived so it all went back into the garage to cure for the day.
Thursday 2nd July 8:30 pm, I did some work on the solar panel mounting by taking out the screws and planning the edges ready to add the next layer of plywood. Another of the corners was coming loose so I mixed catalyst with the dregs of resin in the measuring cup and worked that in between the loose part of the sandwich. I will check that tomorrow morning to see whether the fix worked.
Hopefully the weather will be reasonable tomorrow evening and over the weekend so I can finish off the plywood lamination stage and maybe even start on a layer of fiberglass covering
Friday 3rd July Home from house restoration about 9 with enough daylight left for me to stick the two half pieces of plywood as the third layer of the solar panel mounting. Hopefully there is enough resin to make it stick properly at first attempt this time so that I can add the fiberglass cloth layer tomorrow morning.
Saturday 4th July US independence day! Also what has been dubbed “Super Saturday” because it will be the first day since the COVID-19 lock down that pubs and non-essential shops will be open in the UK.
Woke at 5:30 so I had finished breakfast and was outside by the time my 7:00 alarm went off.
Mainly progress in the solar panel mounting until lunch time. Initially with planning off the excess plywood around the edges. 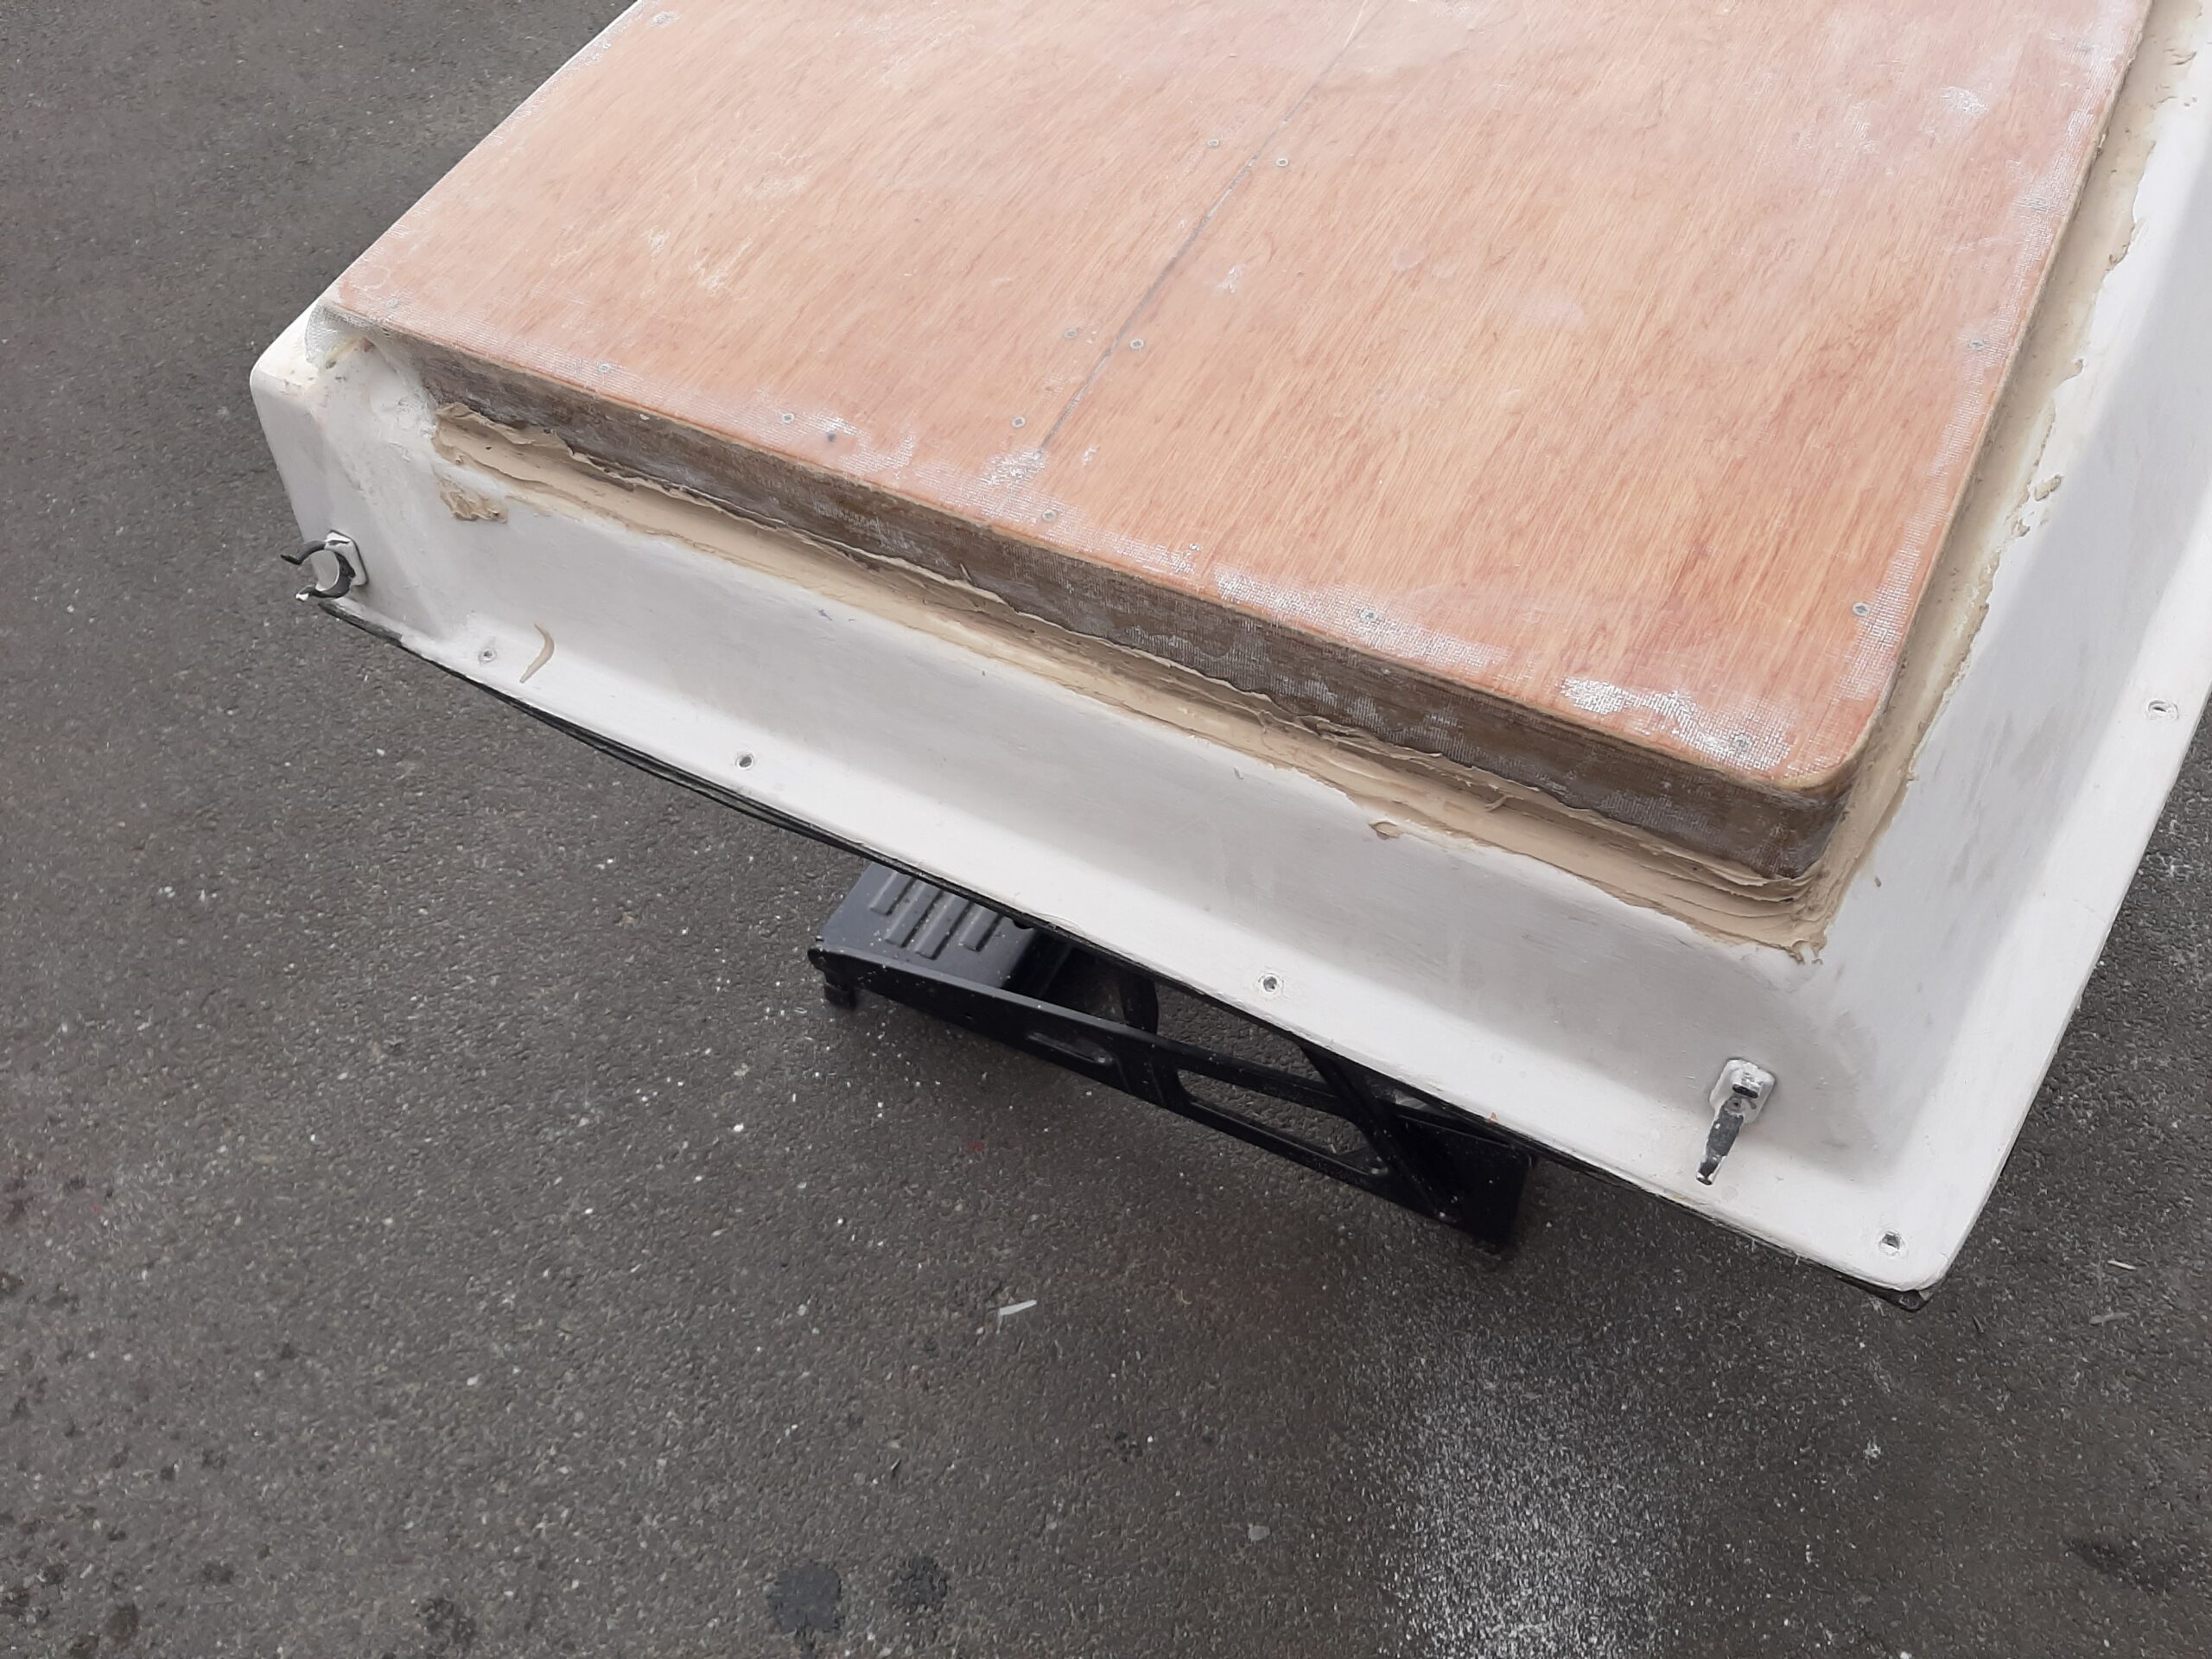 Some of the last of the resin had not gone off properly but it was only the left over resin that had been in my mixing container when I finished the laminating. I had painted it on the plywood as a sort of priming coat ready for attaching the woven glass today but it was still sticky this morning. Rather annoying in that it made the dust from wood shaping stick to the surface. That prompted me to go ahead and add the woven glass as soon as I had removed the excess plywood. The idea was that the catalyst in the fresh resin that is wetting the cloth will make the problem resin cure properly today.
Timing worked out nicely as I had finished the fiberglass work and cleaned up when Grace & Helen were ready to leave to do the shopping.
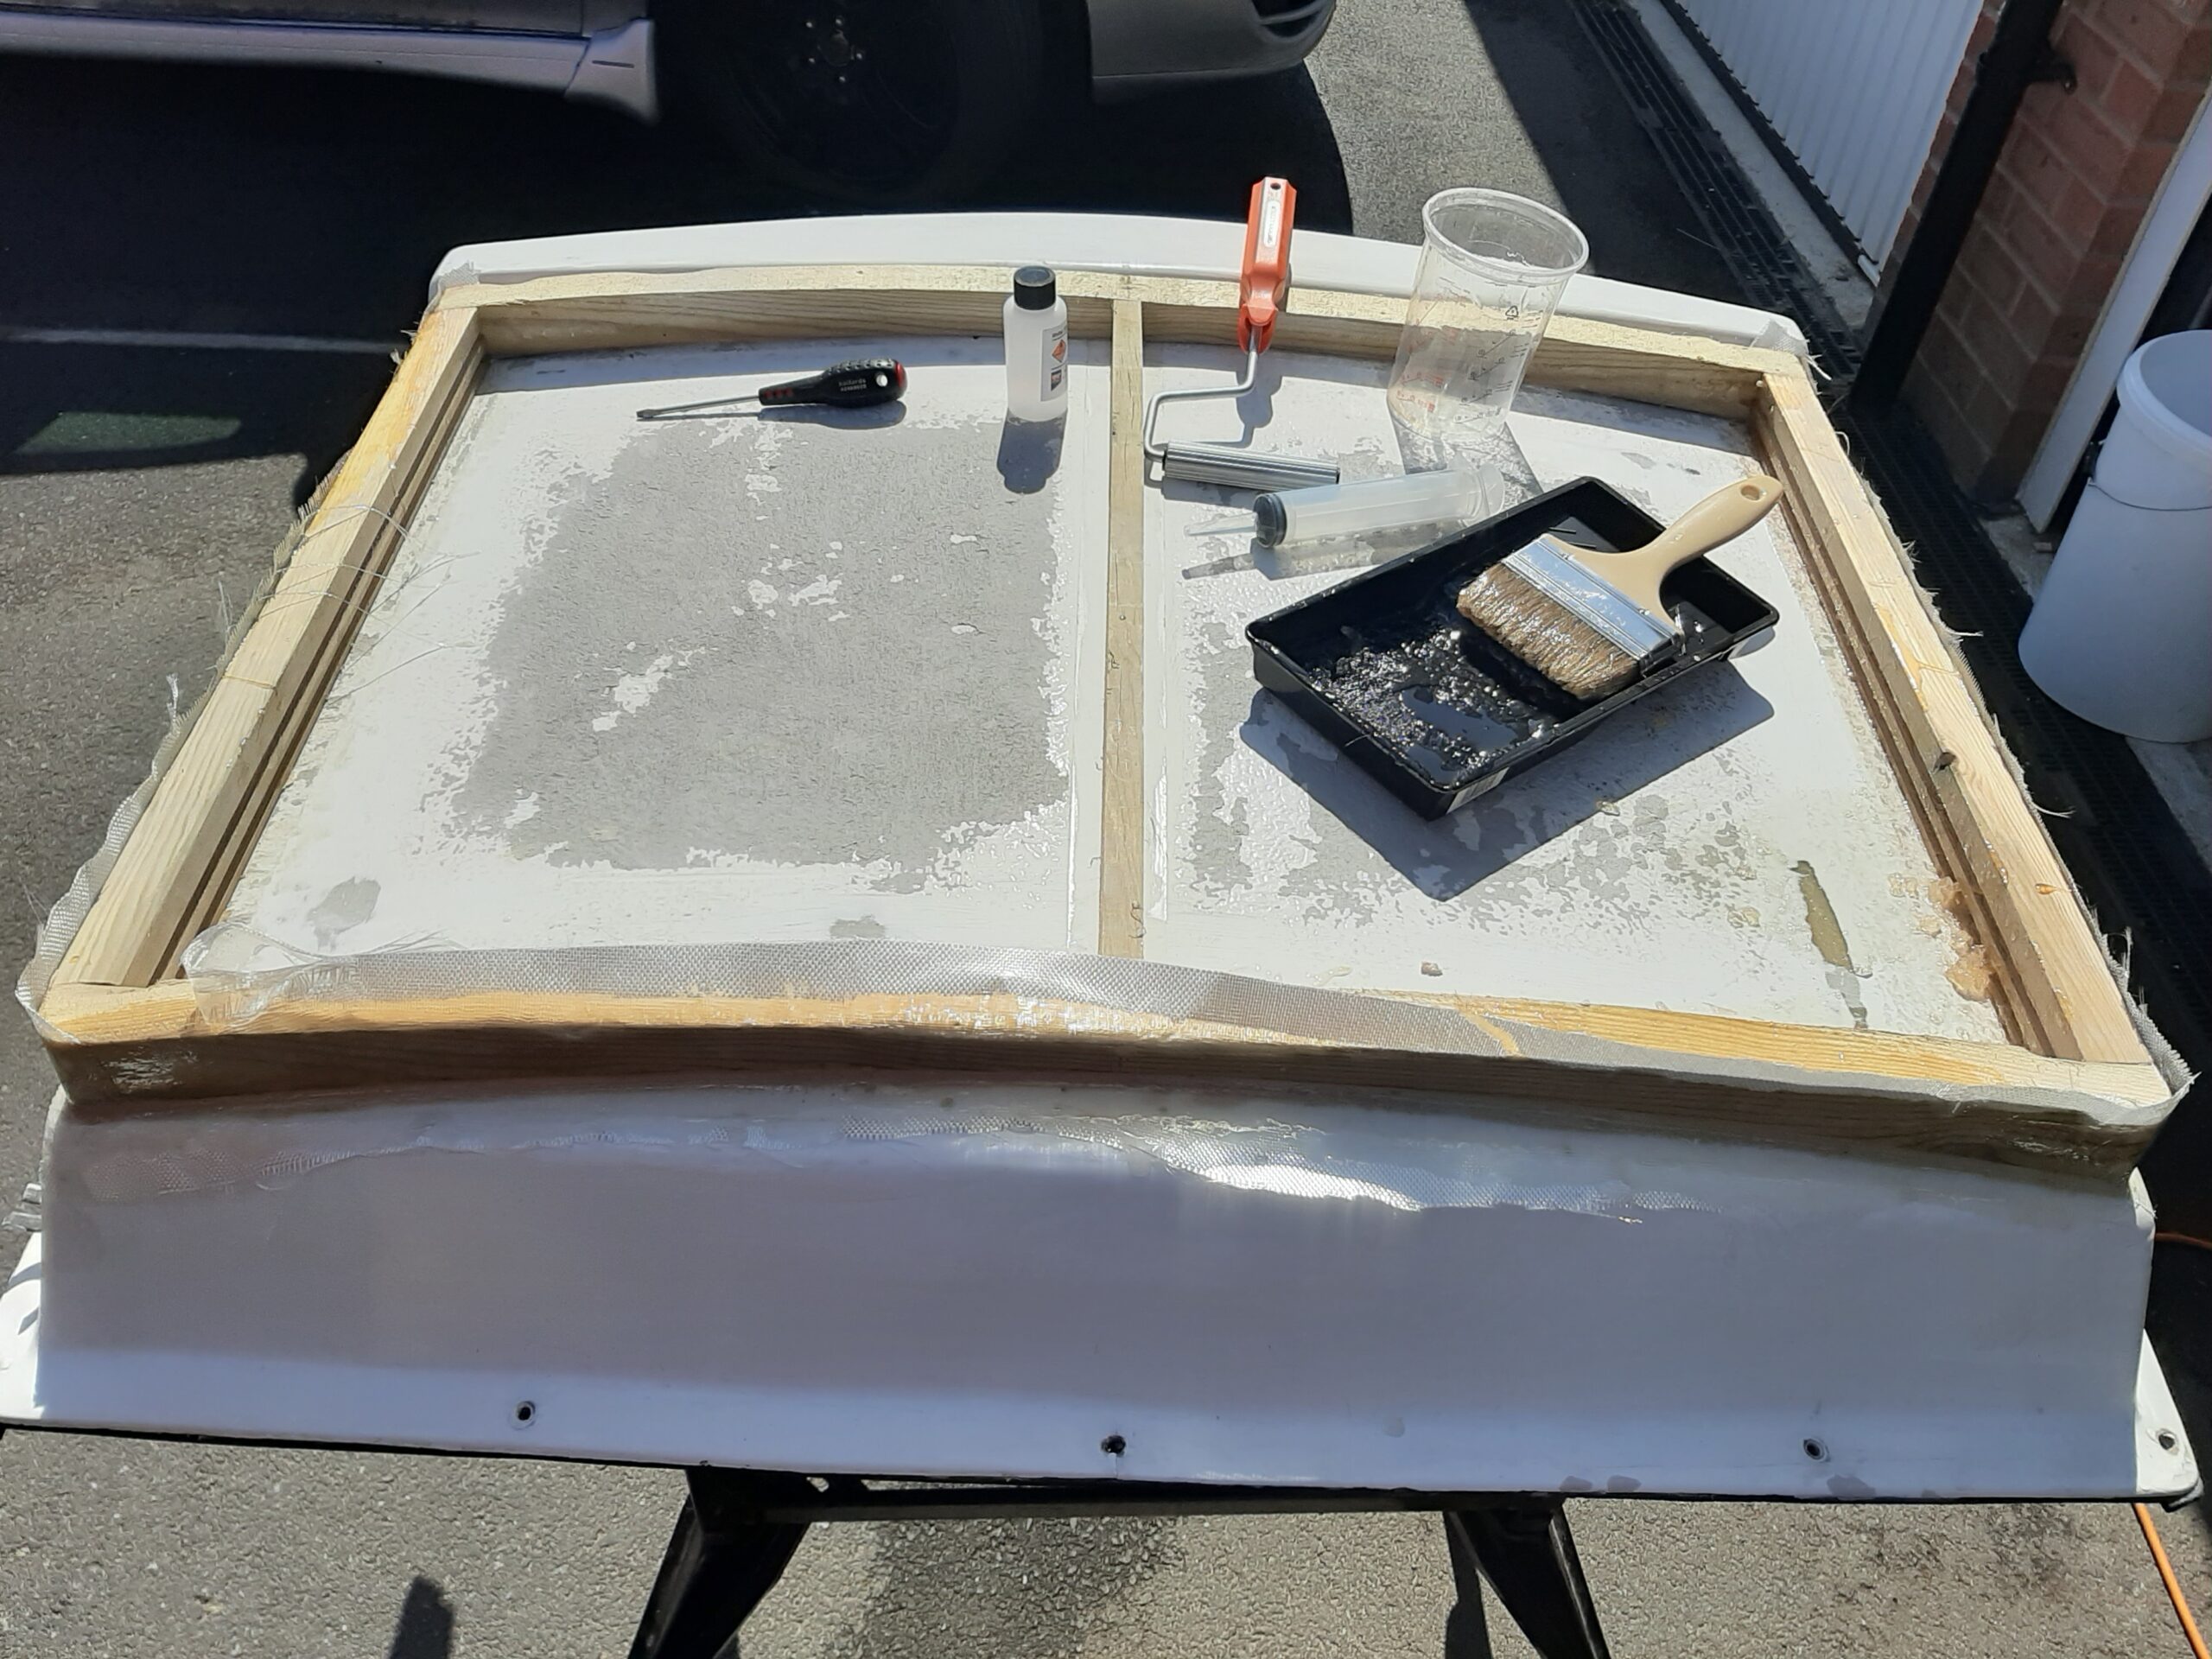
Back home at 11:45 so I got started on sanding the fiberglass to get smooth edges ready to paint. After a sandwich lunch I added P38 filler fillets to get a smooth curve between the edge of the mounting and top of the hatch cover.
After supper I did another brief bit of boat work adding some more filler to an area at the front of the mounting structure which does not follow the curvature of the rest. This will get sanded tomorrow morning to give a smooth curve ready for the test fit of the panel.
Sunday 5th July Another early start with me outside working on the solar panel mounting when the 7:00 alarm went off. Sanded the filler to get a smooth curve on the front edge of the mounting and then painted the original hatch cover and the new addition.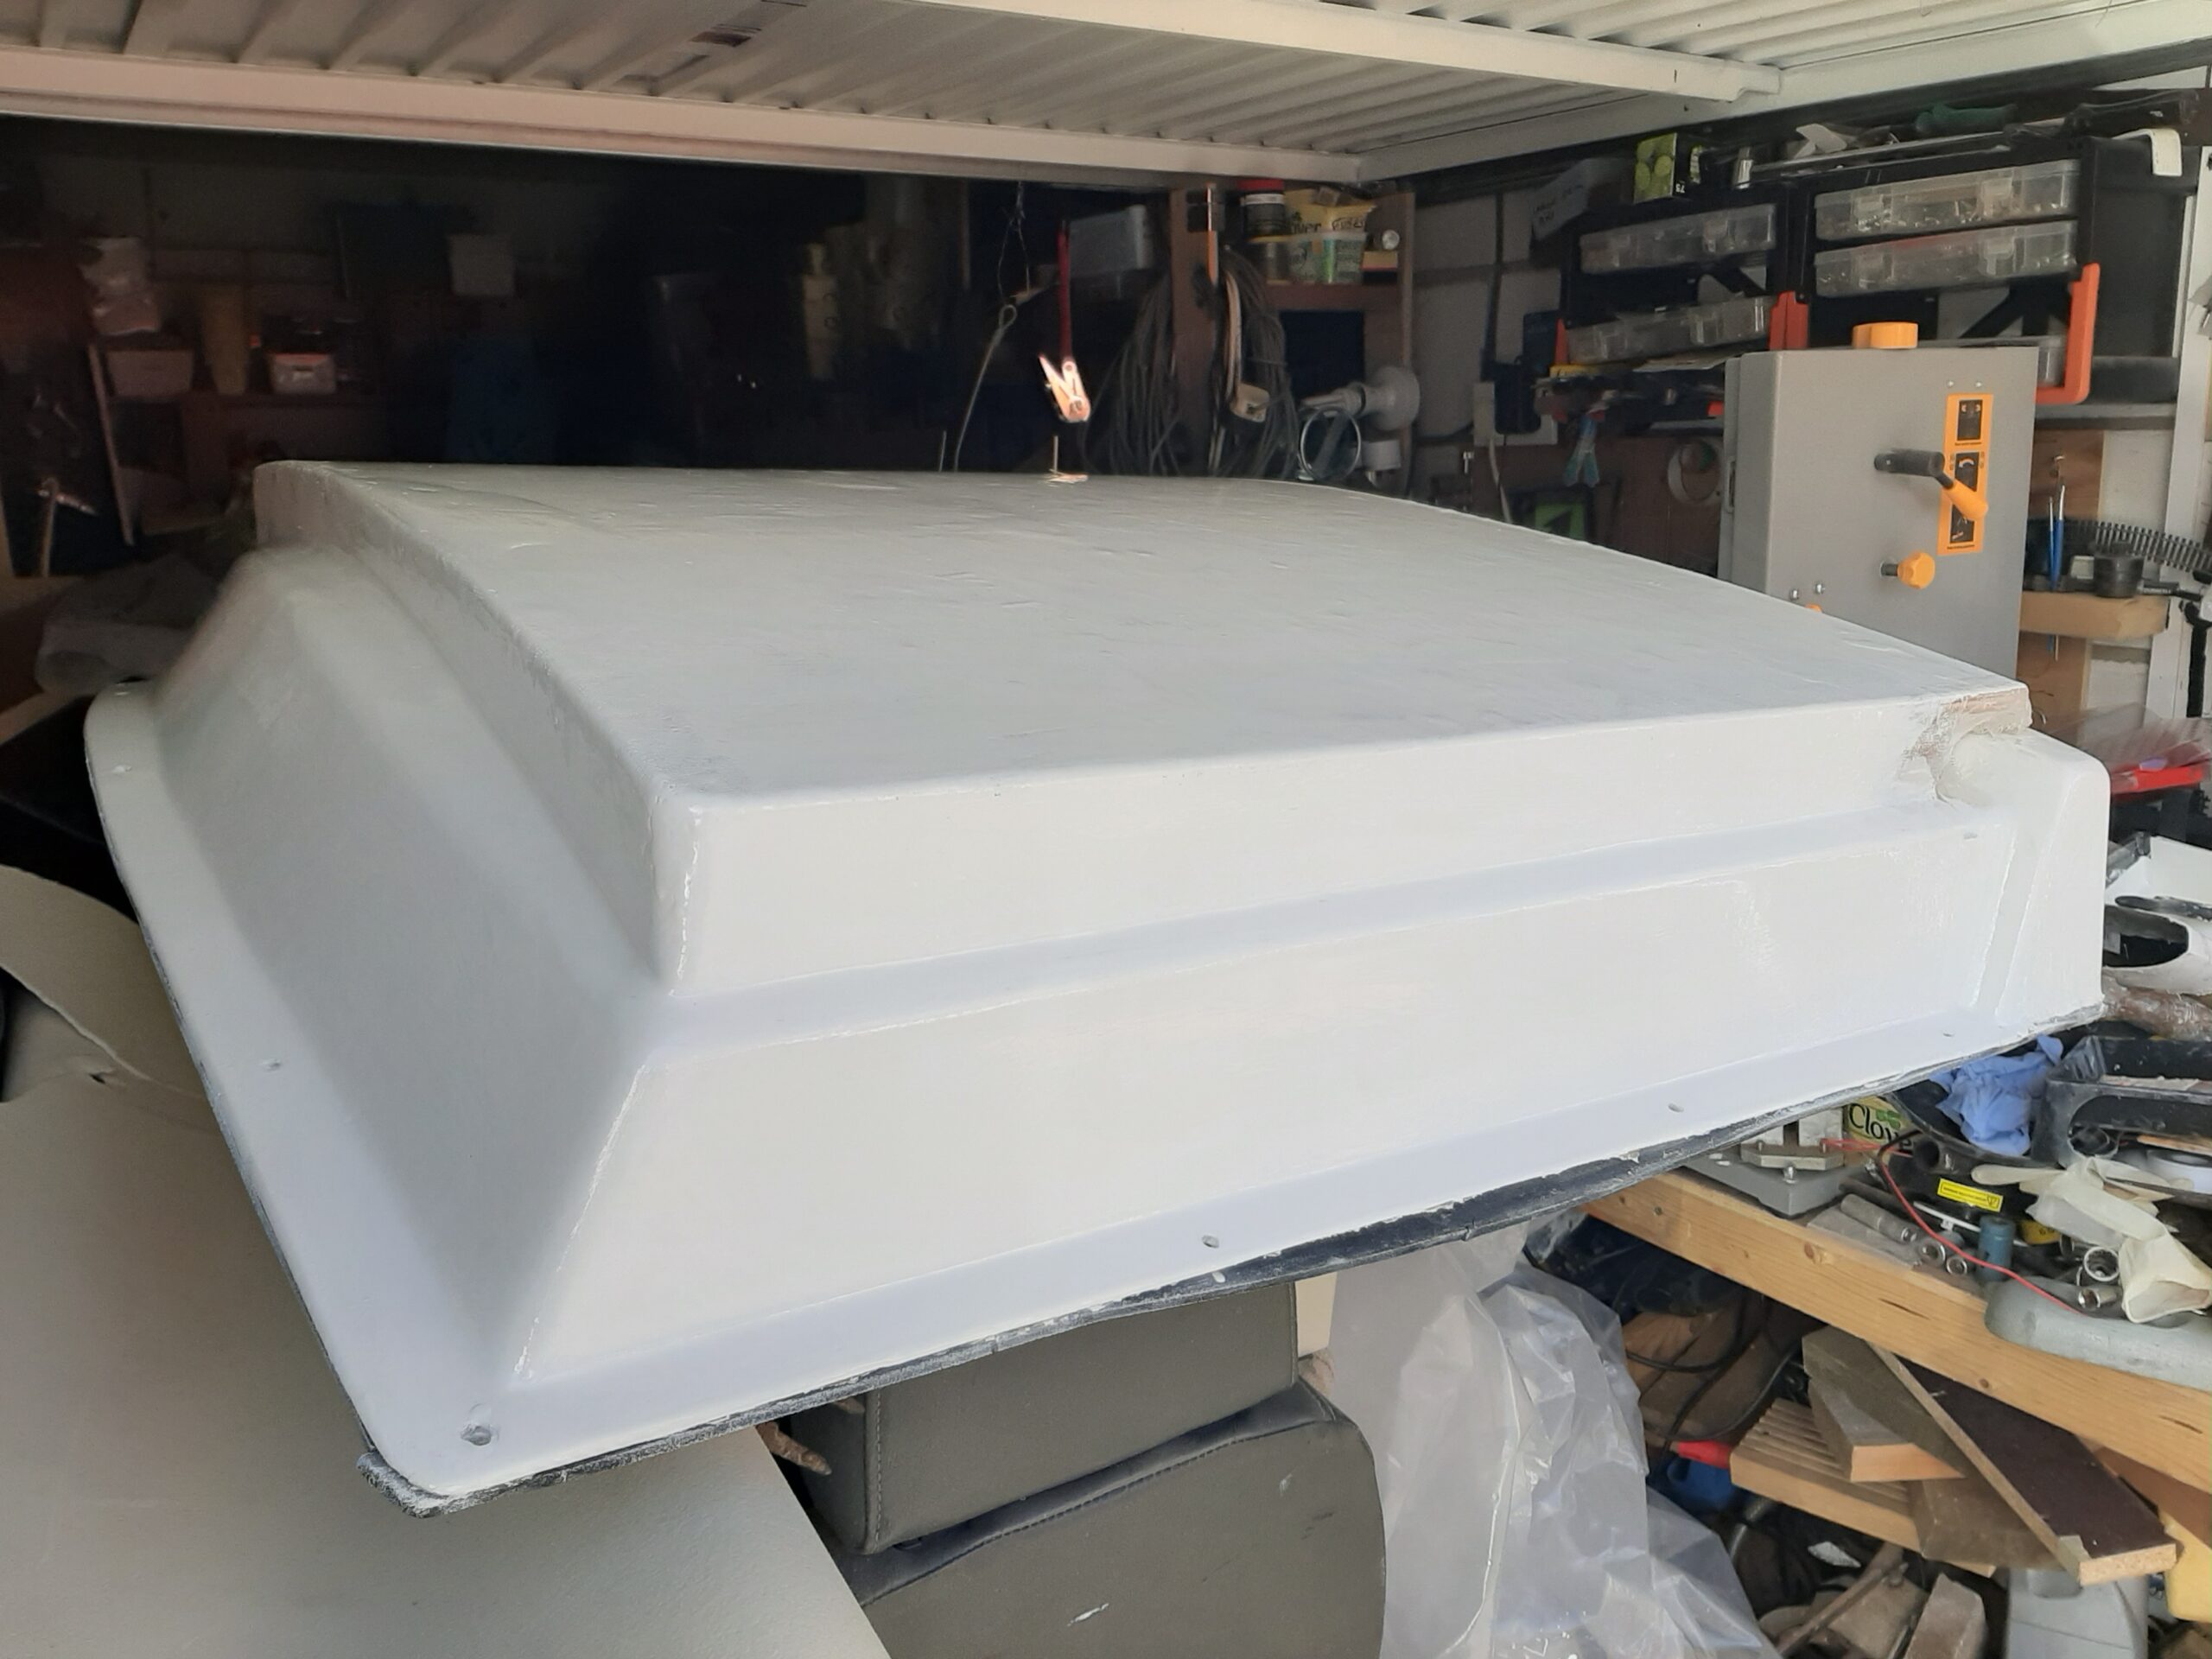 Wind is very strong and gusty today so the whole thing went into the garage to dry even though it was warm and sunny.
I am writing this around 6:00 as I wait for the tea to be cooked and then I intend to try fitting the solar panel on the mounting. There is a little finishing off (more foam in the gap between the hatch cover and plywood aft of the wooden frame) and fiberglass to be done close to the hatch opening but the rest of the assembly should be able to be put back on the boat as a final coat of paint can be potentially done on the boat with the panel screwed down and connected to the controller. The key time critical bit is the wiring as I cannot make progress with the cabin headlining until the cables are in position.
By early evening there was a very gusty wind so not a good idea to half hoist the mast as I would need to do to get the hatch cover into position. Maybe tomorrow evening instead?
Friday 10th The hatch cover is now installed on the cabin top again although it needs two more of the mounting bolts tightening (one is under the mast so not accessible, the other has a damaged thread so I need the right size tap to clean out the captive nut). Need to add some more height to the mast crutch as well because the current one will allow the mast to touch the solar panel which will not be a good idea.
Tomorrow I also need to finish off the aft section of the mounting system (foam & fiberglass reinforcing and then paint it ready to install the actual panel. The panel itself wont take too long to install but any screw holes need sealing to ensure no water gets between the layers – Every hole needs sealing when or before any screws go in.
Saturday 11th I bought some large cable glands some time ago but they turned out to be quoting the size of hole the gland fits into rather than the internal diameter. Currently cannot get the connecters on the cables to come apart so need a larger diameter and also the rubber part tends to pop through the body if it is tightened too much so I don’t trust it to clamp down a lot onto the small cables.
Nothing more done today because we are having an overnight test with the caravan at Clumber Park.
Sunday12th July First job after returning the caravan to storage and unpacking the car was to get the remaining bolt into the hatch cover. Still not sure what the issue was because the tap went in really easily and there didn’t seem to be any significant swarf, rust or anything else removed but the bolt went in fine afterwards. There must have been something because the thread insert had previously taken all the threads off three separate bolts.
Although I couldn’t get the connecters to come apart on the extension cable, the ones on the panel itself came apart OK. None of the internal parts of the connecter are any larger so I only need the glands to let through the cable which is 5mm diameter.
Having sorted out the hatch cover I moved on to building the extra height mast crutch.
I have ordered some Sikaflex clear sealant, stainless steel washers and the smallest cable glands I could find. I expect the sealant and cable glands to be ready tomorrow morning but the washers (which are essential for the final install) will be an extra day or two. Not entirely sure how I am mounting the cable glands on the cabin roof as they look to be intended to fit into a thin walled electrical box and the cabin roof is at least 5 mm thick. Maybe a metal box sealed and bolted to the roof with the glands fitted into the ends. I might have one of the die cast alloy ones that I used to use for electronic projects somewhere in the garage that can be used.
Tuesday 14th July On the way home I had picked up both parts of my most recent Screwfix order. That meant I spent a chunk of the evening working on getting the cables from the solar panel through to the charge controller. The cable glands that I bought turned out to be another set that would just about clamp down to the size of two cables at the same time. Ended up trying to order die cast aluminium boxes and smaller cable glands from online shops but the first one proved impossible to order from because of website features that didn’t work on my phone. Have multiple boxes and glands on their way as well as a replacement for my 40 year old LCD screen multimeter which had a partially failed screen when I tried to use it on the broken van electrics a week ago.
Friday 17th Started the day at 6 with my usual alarm. As it is a day off I was in the garage by a little after 7 getting ready to fit the solar panel onto it’s mounting. There is still a bit of work to do to finish off the build but I might as well be organised ready for the cable gland bits to arrive.  10 screw holes later it is installed with a little silicone sealant around the screws and a fillet right around the edge of the panel. Plugged it into the extension cables and wired it to the controller so there was charge going into the batteries.
 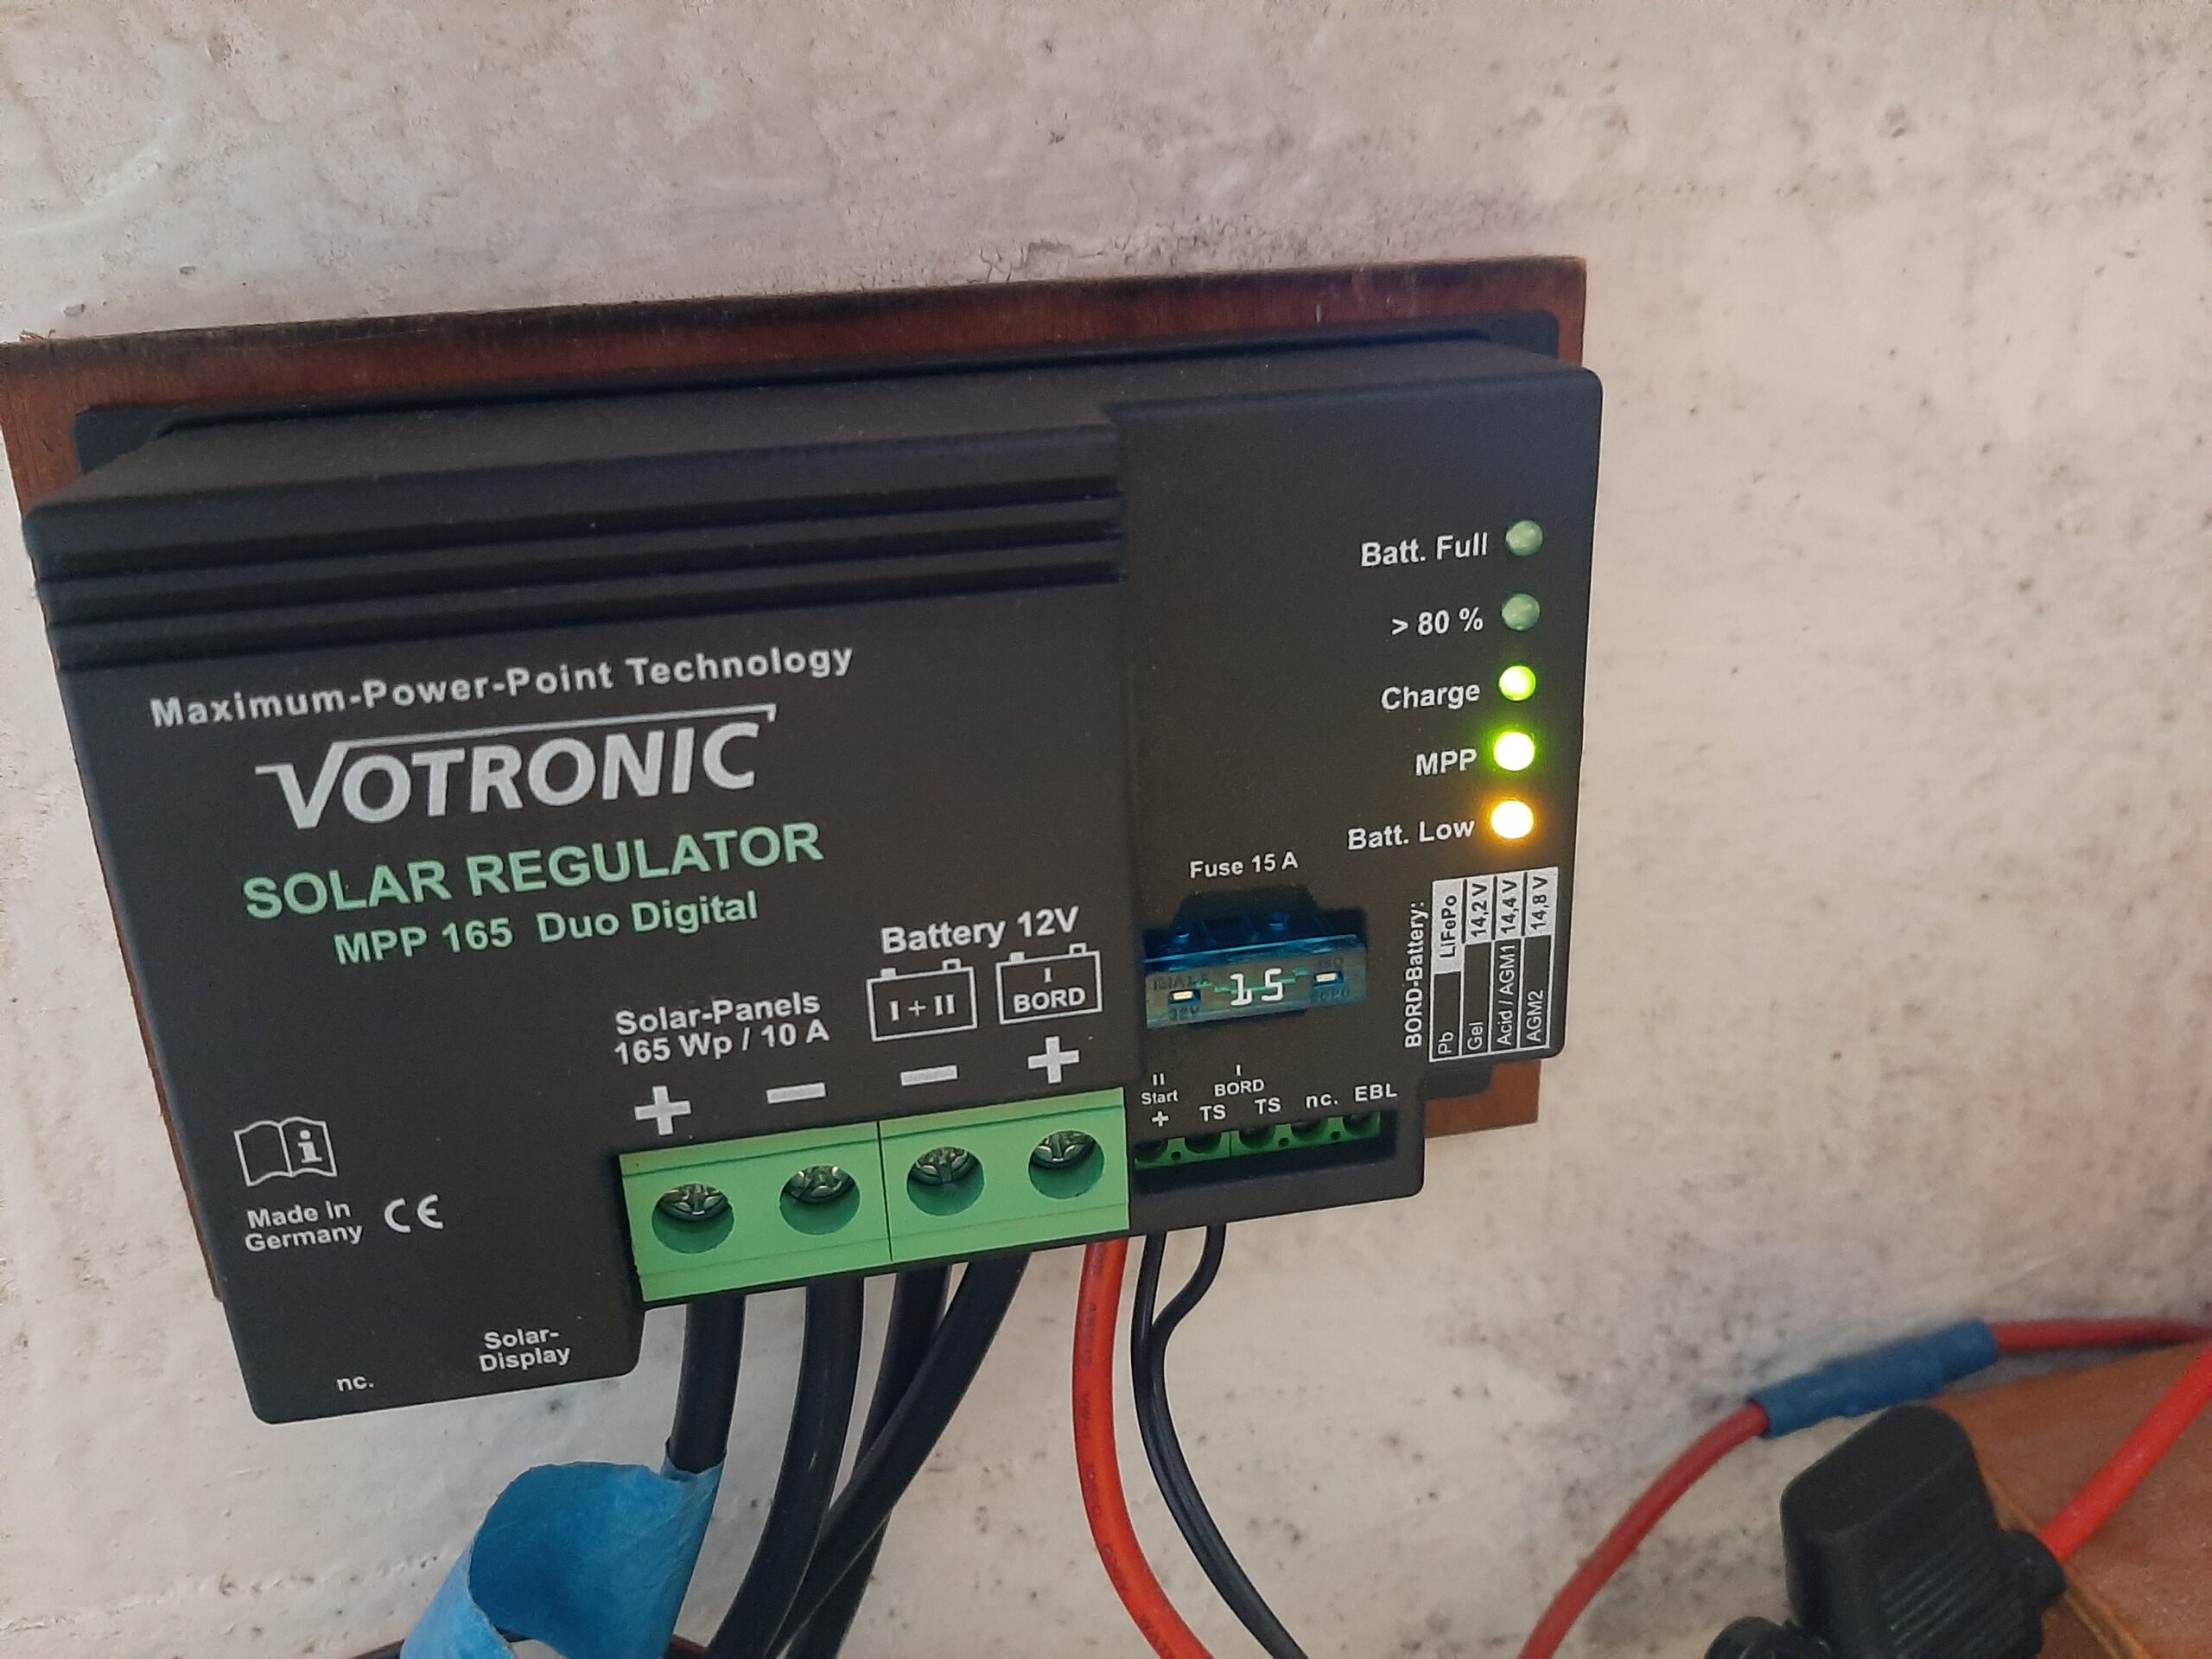 Panel is producing 20V even though it is partly shaded by the mast and bits of rope. Works as a temporary install with the cables through the hatch
After a bit of work on house fencing we received the boxes and small cable glands. I have drilled all the holes, painted the box and finally assembled it ready to disconnect the cables tomorrow morning, fix the box to the roof (two M4 stainless bolts & plenty of silicone), dismantle the connecters to thread the 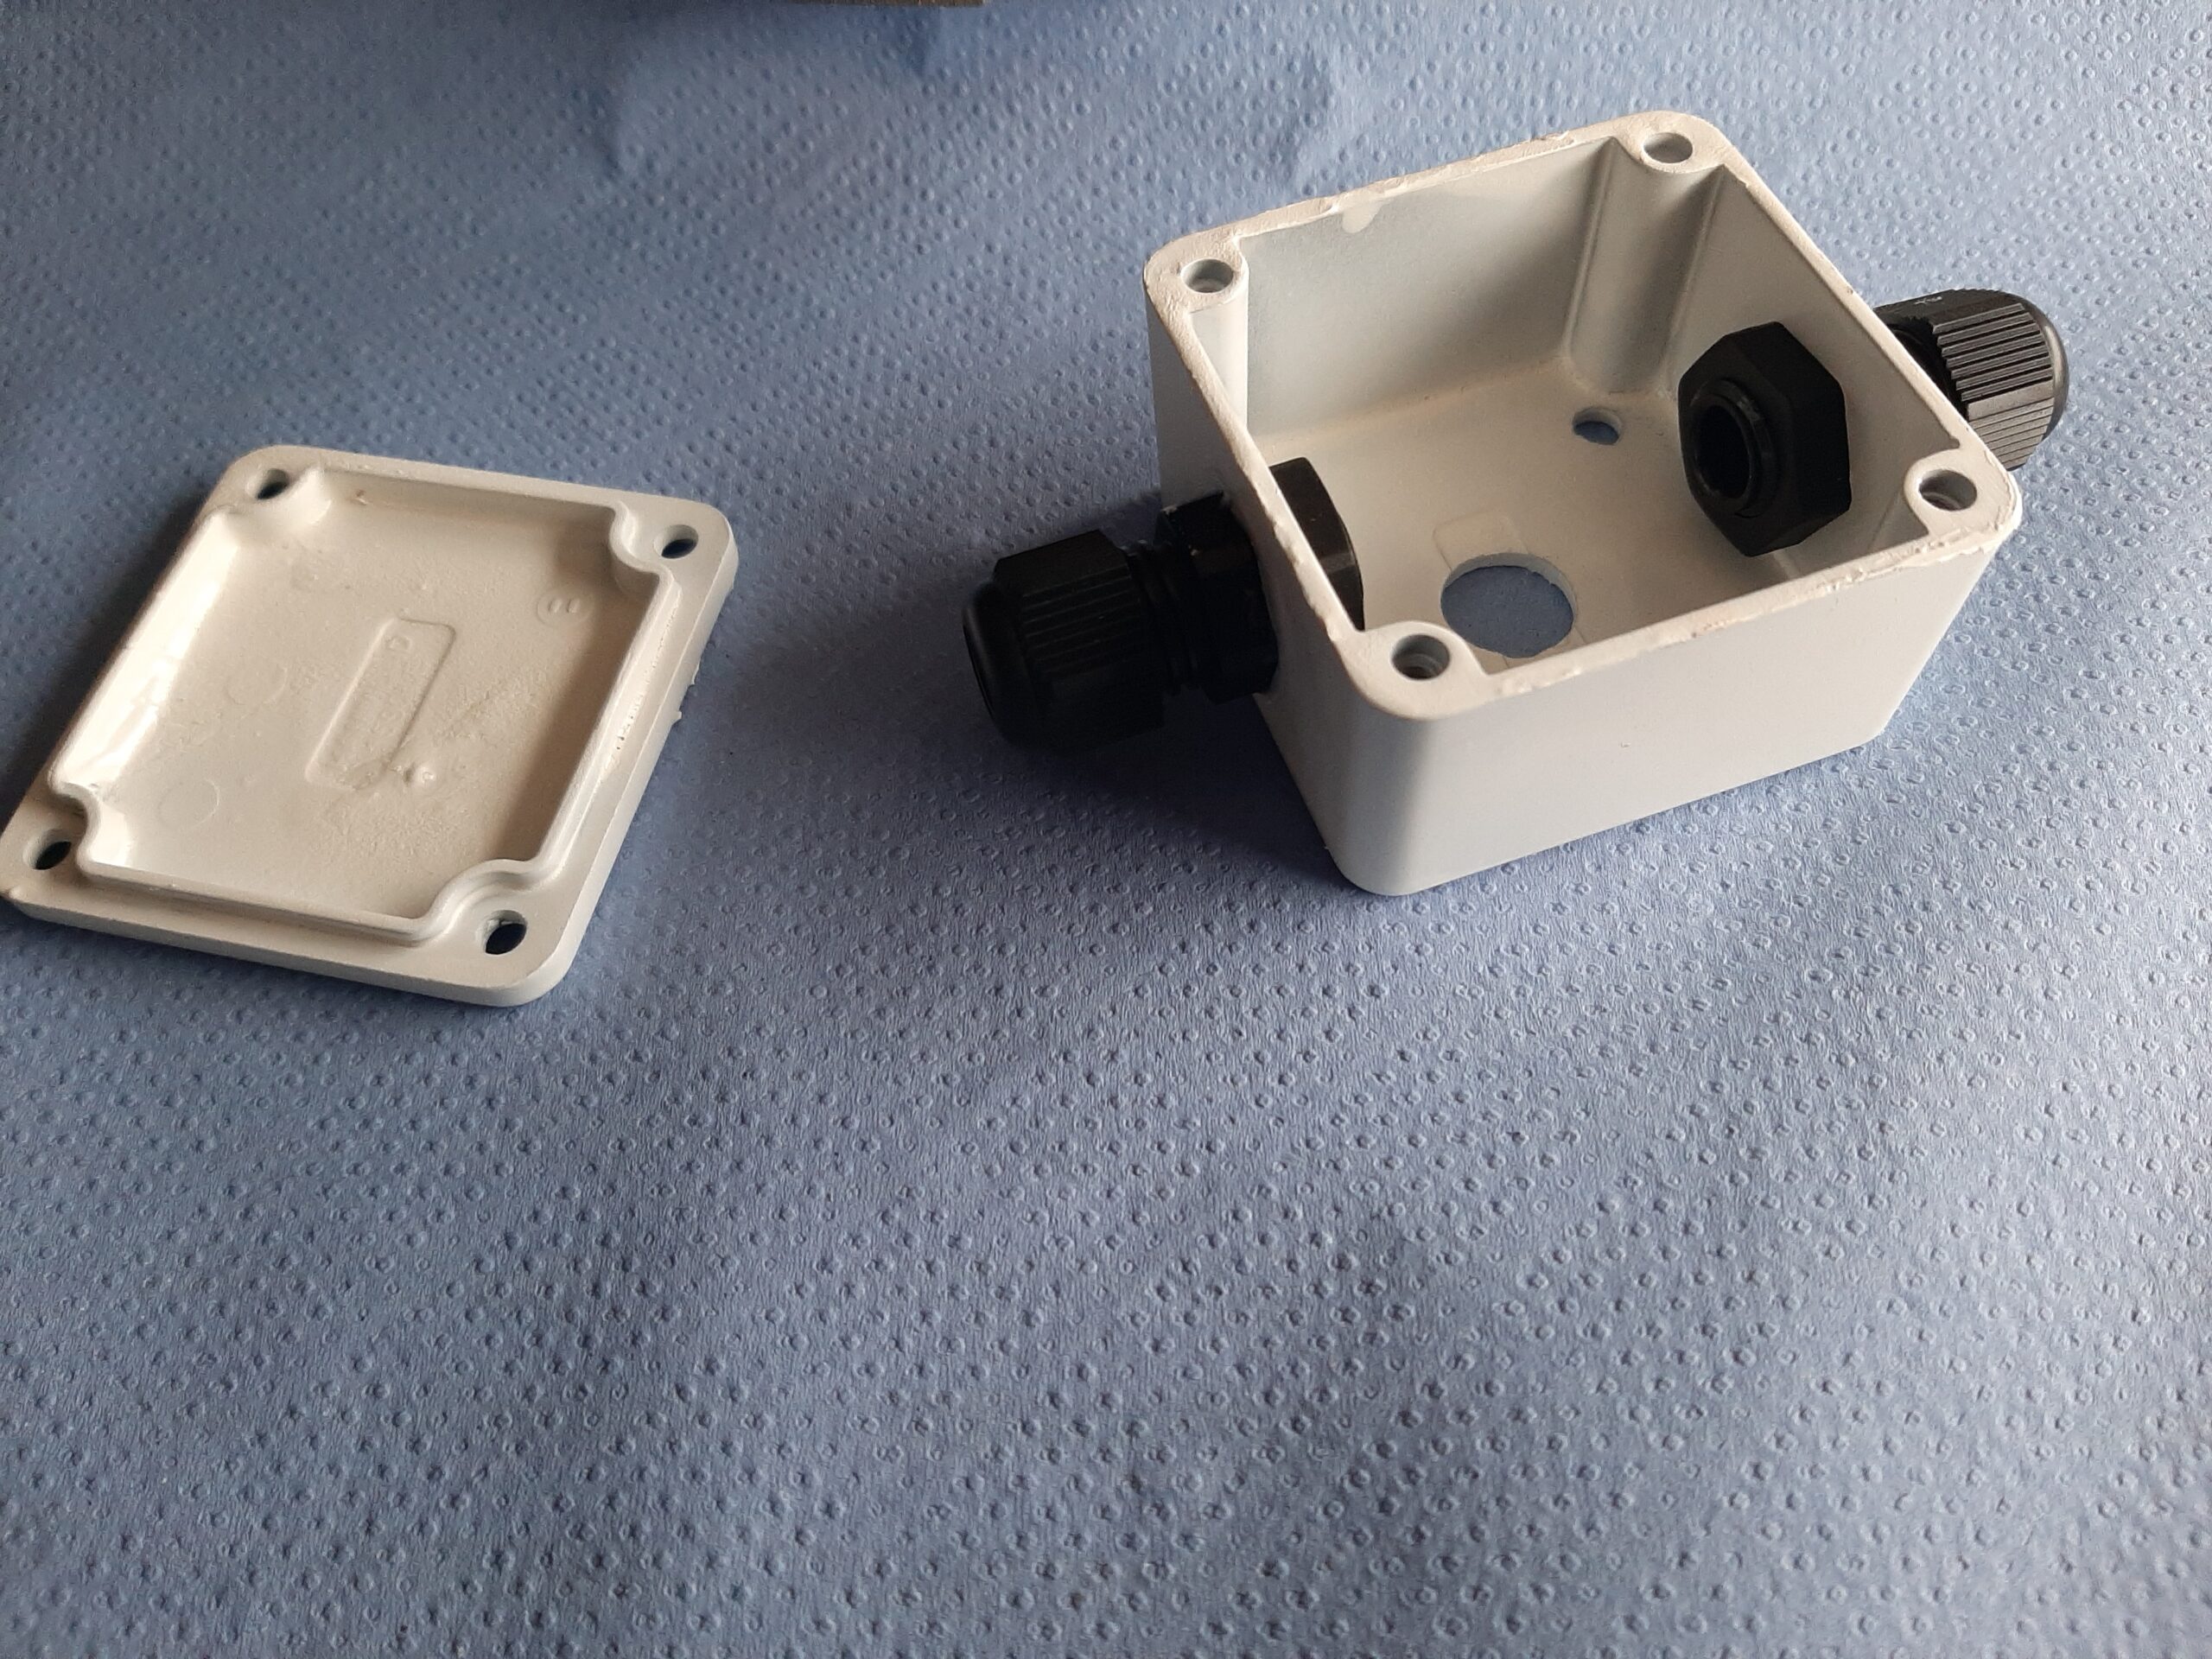 cables through and then re-build the connecters. Once that is done I can fix the cables in place with P clips and get started on the cabin headlining itself. The port side is easiest because the shape is a lot simpler but all of this solar panel stuff has to be finished before I can make a start that side.
By 9:30 when I packed in on the boat the panel was down to producing 16V which seems to be a little marginal for charging even though the leisure batteries are still down at 9 volts.
I have an order in at euro car parts for the P38 filler to finish off the solar panel mounting structure by filling the gap around the hatch and smoothing out some of the weave patterns which are still showing from the fiberglass cloth
Saturday 18th July Fairly easy to fit the box as the connecters came off easily and then the wires threaded through.  Not got the cover on the box properly yet because somewhere between drilling the box yesterday and bolting it to the roof I have misplaced the bag with the four screws in it. I am seriously tempted to re-tap the holes to take the M4 stainless bolts as the original ones are guaranteed to be mild steel and therefore will corrode. For now the lid is glued on with silicone sealant to keep out the rain.
There will need to be a bit of cable securing work before the headlining goes in but the batteries were receiving power from the panel so the major aim of this mini-project has been completed.
Oh and I still haven’t managed to get the 6mm marine plywood!