The title might seem like a totally un-connected with boat restoration but bear with me and it will make sense.
It feels to me as if I have been here before only last time Matt and I bought in the decorative lining cards ready done and then struggled to adapt some of them to fit the van we really had instead of some other version that had been measured. Basically the ones on most doors fitted but around half of them needed us to trim plywood cores, drill new mounting holes and re-attach the vinyl. Some we even had to start completely from scratch transplanting the bought in covering onto a new plywood core. We learned a little and it also helped that we still had some adhesive left over from that project.
As I have already said elsewhere, all of the items involved with this restoration are available from other sources, any references to particular sellers or products relates to where I obtained the items actually used. None of the suppliers were aware of what I was using their products for or of the existence of any social media presence (not that 0 hits on this blog and 22 followers on instagram as I write is much of a presence) so I paid full price and have no commercial links with any of them.
The same or similar products might have been available elsewhere at lower cost but I was dealing with UK suppliers that were still on-line and obviously delivering during the Covid-19 lockdown. Nobody let me down and deliveries were all acceptably prompt, often significantly quicker than would be the case in normal times for the service I had paid for.
For those who may not know what I mean by a door card – These are 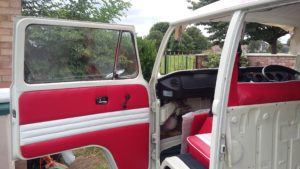 the part of the vehicle body that you see as the interior – There is a semi flexible core (often thin plywood or fiber board in a classic car) with a foam padding followed by vinyl or fabric covering. These are basically glued together and the final layer wraps around the edges. The whole assembly is attached to the vehicle body using clips of some sort.

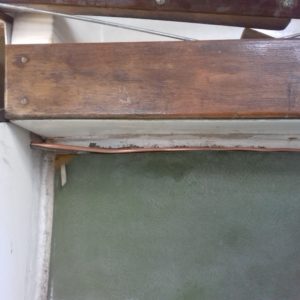 The hull surfaces in the cabin were originally covered in the same sort of way. You may already have noticed that early photos of the restoration had coloured areas of hull (green or cream) and that they disappeared when I started painting the interior. The original cards had damaged vinyl cloth, perished foam between the core and vinyl and some even had rotten plywood. They were originally attached to the hull by another layer of perished foam so were not challenging to remove.
I wasnt trying anything difficult like the multi-coloured pieces or stitching effects used on the camper van – Plain blue worked for me but you could add upholstery buttons and/ or thicker foam if you were being adventurous.
As well as a decorative purpose, the lining provides insulation between the living area and the hull which might otherwise be in direct contact with crew members on one side and very cold water the other. Even on the land I had been having issues with condensation inside the hull so I was determined to ensure the new cabin finishing provided better insulation than the original. I planned to follow an article that I saw somewhere which described using closed cell foam camping matresses as insulation. 6 of these provided all the insulation for the hull.
From the 13th April until 25th seems to have been one long sequence of lining boards, insulation and velcro. Does have a positive side though in that I love the smell of the solvent in impact adhesive although even I have to admit you need to ventilate the workspace when doing big areas. Fortunately this was a warm spell so the glue went tacky quickly and I had plenty of space due to working outside.
The construction of each new card typically started by allowing the vinyl to fall off the original plywood after which as much of the original foam as possible was removed using an ordinary paint scraper. My boards were already marked to show where they went, which way up and which side is the inside. Mark all of yours at this stage to avoid errors later.
I seriously considered replacing all of the plywood cores which might have given me better edges to the boards but the lack of availability of large enough sheets of 3mm plywood during the lockdown phase of the pandemic would have prevented progress and the plywood for the hull panels was in a reasonable condition. The work was possibly helped by the liberal coating of impact adhesive on both sides.
They will form another blog post but I will definitely have to replace the boards involved in the ceiling because of rot and several attempts by previous owners to stick the boards to the cabin roof directly using resin  based filler. Those two pieces account for 2 of the 4 sheets which I would need to do the whole job from new because they are well over half the width and almost the full length of an 8’ by 6’ sheet; no way to make them both out of one sheet or combine with other major panels to economize on plywood. Obviously I also need to work out and install a better system of blocks to hold the lining on the ceiling and make sure there are no remaining leaks in the roof.
So here is the materials list with links to more information or the suppliers I got them from.
Contact adhesive – I used 2 different types of spray adhesive left over from the campervan headlining install and 2 types of conventional contact adhesive – All worked perfectly for the appropriate parts of this job. –
- Normfest Superglue https://www.justkampers.com/super-stick-multi-purpose-adhesive-400ml.html (also available from from euro car parts when I ran out of both spray types).
- Trim fix adhesive https://www.justkampers.com/trim-fix-adhesive-500ml.html
- Evo-Stik 528 (From Screwfix https://www.screwfix.com/p/evo-stik-528-industrial-contact-adhesive-transluscent-amber-2-5ltr/42076 )
- High temperature contact adhesive https://www.justkampers.com/contact-adhesive-1-litre.html . I found this one spread more easily using a paint roller than the Evo-stik one.
Camping mat – There are loads of these on ebay at various prices. Mine were 6 mm thick and cost around £13 each.
Scrim foam 3mm thick 10 M roll https://www.as-trim.co.uk/index.php?main_page=product_info&cPath=9_45&products_id=92&zenid=7ls9i9pqut99icmndv8f8a0uk5
Vinyl covering – https://www.cjmarine.co.uk/product/sauleda-acrylic-canvas-pu-coated/
5 cm wide velcro – https://www.as-trim.co.uk/index.php?main_page=product_info&cPath=10_42_60&products_id=121&zenid=7ls9i9pqut99icmndv8f8a0uk5
For the first panel I did the one that goes in behind the galley shelf. 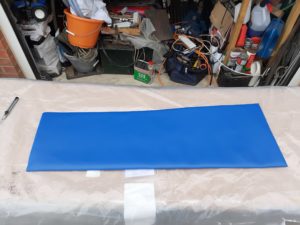 That was so small that it rather tricked me
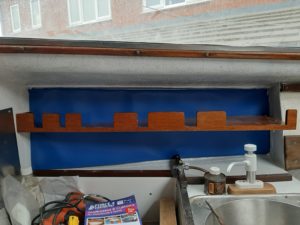 into a false sense of security. By all means start with a small one if you are unfamiliar with the process but it will all get a bit more difficult with larger panels. and despite the impression I got from this first board, you do need to glue the fabric cover to the foam padding.
After the old vinyl material was removed I had noticed that the plywood never seemed to have been all that close to the other structures around the edges but that didnt seem to matter with the original vinyl covering. In an attempt to rectify that on the
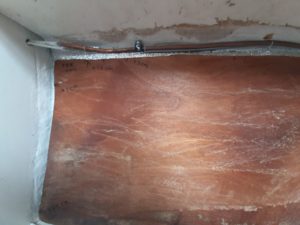
second panel I went round the starboard side of the main cabin measuring and marking off the amounts that the finished board needed to overlap the plywood edges by and then cut straight edges on the foam that much outside the plywood edges. You will see that was a mistake from the second board as the foam didnt hold the tension and I hadnt glued the vinyl to the foam. I may have to re-do that panel. First nugget of wisdom – Support panels should be a good fit and generally have straight edges. Otherwise start with new panel cores and allow enough space for the vinyl to wrap around to the back. At least 2 fabric thicknesses at each side. You will also need gently rounded corners as a sharp 90 degree one will puncture the covering.
Step one of the final process is to cut the scrim foam a couple of cm over size for the panel and use aerosol type impact adhesive to coat the plywood and the fabric reinforced back of the foam. The instructions call for vertical spray pattern on one surface and horizontal on the other and around an 80% coverage. Second nugget – Spray adhesive is awesome for this. Dont bother trying with brushes, rollers, spreaders or ordinary contact adhesive for this bit of the job, it is a waste of time and effort.
I used a wallpaper pasting table because it was almost large enough to work on the whole of the largest board. I also had large sheets of waste polythene to protect the table while I spread / sprayed glue. These can then be removed and left for the inevitable escaped glue to dry while you can still use the table without contaminating anything with half set glue.
Once the spray adhesive is tacky put the board on the table glue side up then line up a long edge of the foam and smooth it into place onto the board. For pieces which are too large to handle easily you may have to lay the foam on a groundsheet and lower the core gradually and have one or more helpers to make sure this step goes well.
Step 2 – When the glue has gripped the foam, flip the board over and smooth the foam out to ensure a smooth flat surface and good adhesion to the core. Now trim around the core using a very sharp blade to avoid tearing the foam.
Step 3 – Lay the vinyl covering face down on the working table and cut round the board leaving plenty of extra all round (at least 2 maybe even 5 cm) as this will be glued to the back of the board. More spray glue all 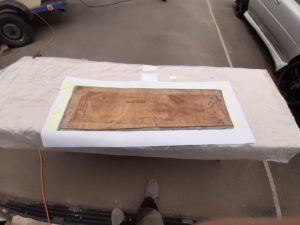 over both surfaces to be joined, this time on the back of the vinyl and front of the foam. When the glue is tacky start with the board on the table and line up one edge or end of the vinyl with the chosen amount of overlap and smooth it down. – Unless you can spare a whole sheet of foam this has to be right first time. You should now be able to gradually lower the vinyl onto the foam maintaining a slight even tension. Once it is all layed on, smooth it down to ensure good
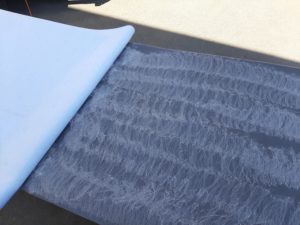 adhesion all over. I did one board in two halves – spray half the vinyl and half the foam and smoothly roll the vinyl onto the foam once the glue is tacky. Then spray the remaining foam and vinyl. That worked but I think might give the possibility of uneven tension so I only did it on one board.
Step 4 – Check the table is free of stray glue and then flip the board over again to work on the back. – For this step it seems best to do top and bottom edges as a pair then do some trimming around the corners 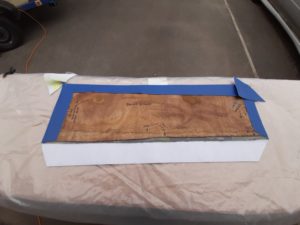 and do the ends as a second pair. Spread a layer of glue around the edges of the core and on the overlap of the vinyl and allow it to go tacky – This bit is definitely where the usual type contact adhesive starts to be the best option. Roller application or a spreader seems to work but I found the roller was quickest using enough glue poured into a small paint tray before you start each edge.
Once the glue is tacky (longer for spread glue than sprayed) fold the vinyl around the edge of the board and smooth it down. If it is tight enough there will be a nicely even radiussed edge without obviously uneven tension or stretch marks but you can also leave it slightly looser if you dont want the edge of the finished board to exactly follow the solid core. At each corner cut the overlapped and free pieces of vinyl to give an angle of about 45 degrees starting about 2 mm from the end of the straight edge and about as far from the edge of the board (you will be able to judge this after one or two boards). This will mean you can glue the top, bottom and ends while leaving corner flaps (you can see one of these in the photo above right). Now glue the other pair of straight edges. Finally finish the corners by trimming away any overlaps from the adjacent edges and cover the back of the flap and a short diagonal on the board with glue. When that is tacky tension the corner a little and glue down the flap. Once everything is set nicely you can trim off the excess vinyl covering
Step 5 – Cut the camping mat insulation to fit the hull, again these should be labelled if it is not absolutely obvious where they fit. I dont think it really matters which way up you do it but I had the foil side on 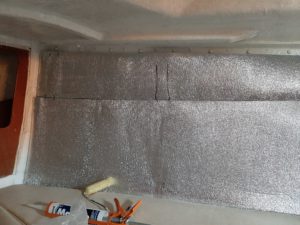 the inside purely because I thought that would reflect warmth back into the boat without also warming the 4 or 5 mm of foam. Almost certainly not a difference you would be able to measure. While you are doing this mark where any join lines are because that needs to be considered when positioning the velcro on the hull.
Step 6 – Glue strips of one part of the velcro onto the hull surface. You will need to position the strips to account for insulation joins and any 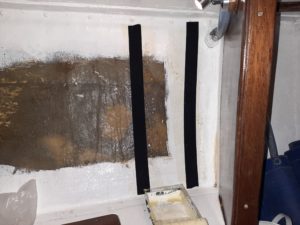 particularly significant curvature required in the lining boards. I used the ‘hook’ part on the hull because I didnt imagine ever having to leave the board and insulation off the boat while using it. One day I may regret that decision when the hull grabs an item of clothing and wont let go easily.
Step 7 – Once the hull strips are drying out, place the insulation in 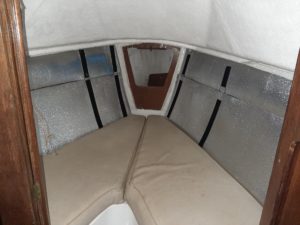 position and mark where the lines of the velcro would intersect with the edges of the insulation. Glue the opposite half of the velcro pair (Loops in my case) to the hull side of the insulation aligned with the marks and then do the same on the inside surface with the same part that is on the hull.
Step 8 – Now transfer the marks for the edge of the velcro onto the 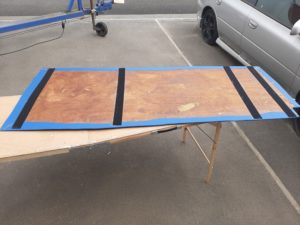 back of the boards and glue the final set of strips in place.
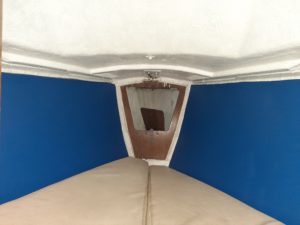 Finally step 9 – put it all together – Velcro the insulation in place on the hull and then add the finished lining boards. I found the velcro grabbed hold really well so peel very careful if you have to take anything off again, the velcro may stay together better than the glue.